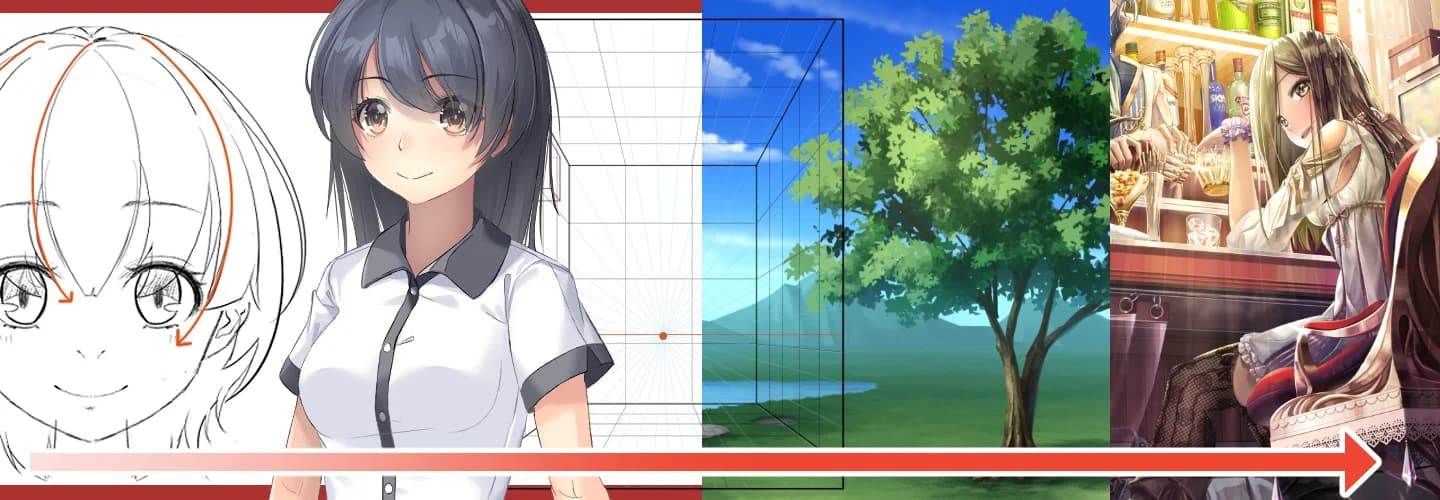
Learn everything from human anatomy basics to creating finished illustrations!
A course by takaillust, Illustrator, Game Graphic Artist, and Illustration Instructor
Course details
- Foundational to Intermediate
52 videos
13 hours 14 minutes
Japanese
English, French, Spanish, Korean, Mandarin (Simplified), Mandarin (Traditional)
English, French, Spanish, Korean, Japanese, Simplified Chinese, Traditional Chinese
Downloadable resources included
Price:
$299
Course introduction
takaillust, Illustrator, Game Graphic Artist, and Illustration Instructor
I've built this illustration learning program with a focus on specific learning steps and understanding the "why" behind them.
Build your illustration skills step-by-step with essential knowledge and techniques.
This course stands out for three main reasons.
First, you'll start with face drawing and work towards completing a full illustration using perspective. While complex illustrations require a wide range of skills, this single course covers everything you need.
Second, the lessons and assignments follow a step-by-step format. Starting with beginner levels, we've organized tasks by difficulty and importance so you can naturally reach your goals just by following along.
Why take this course?
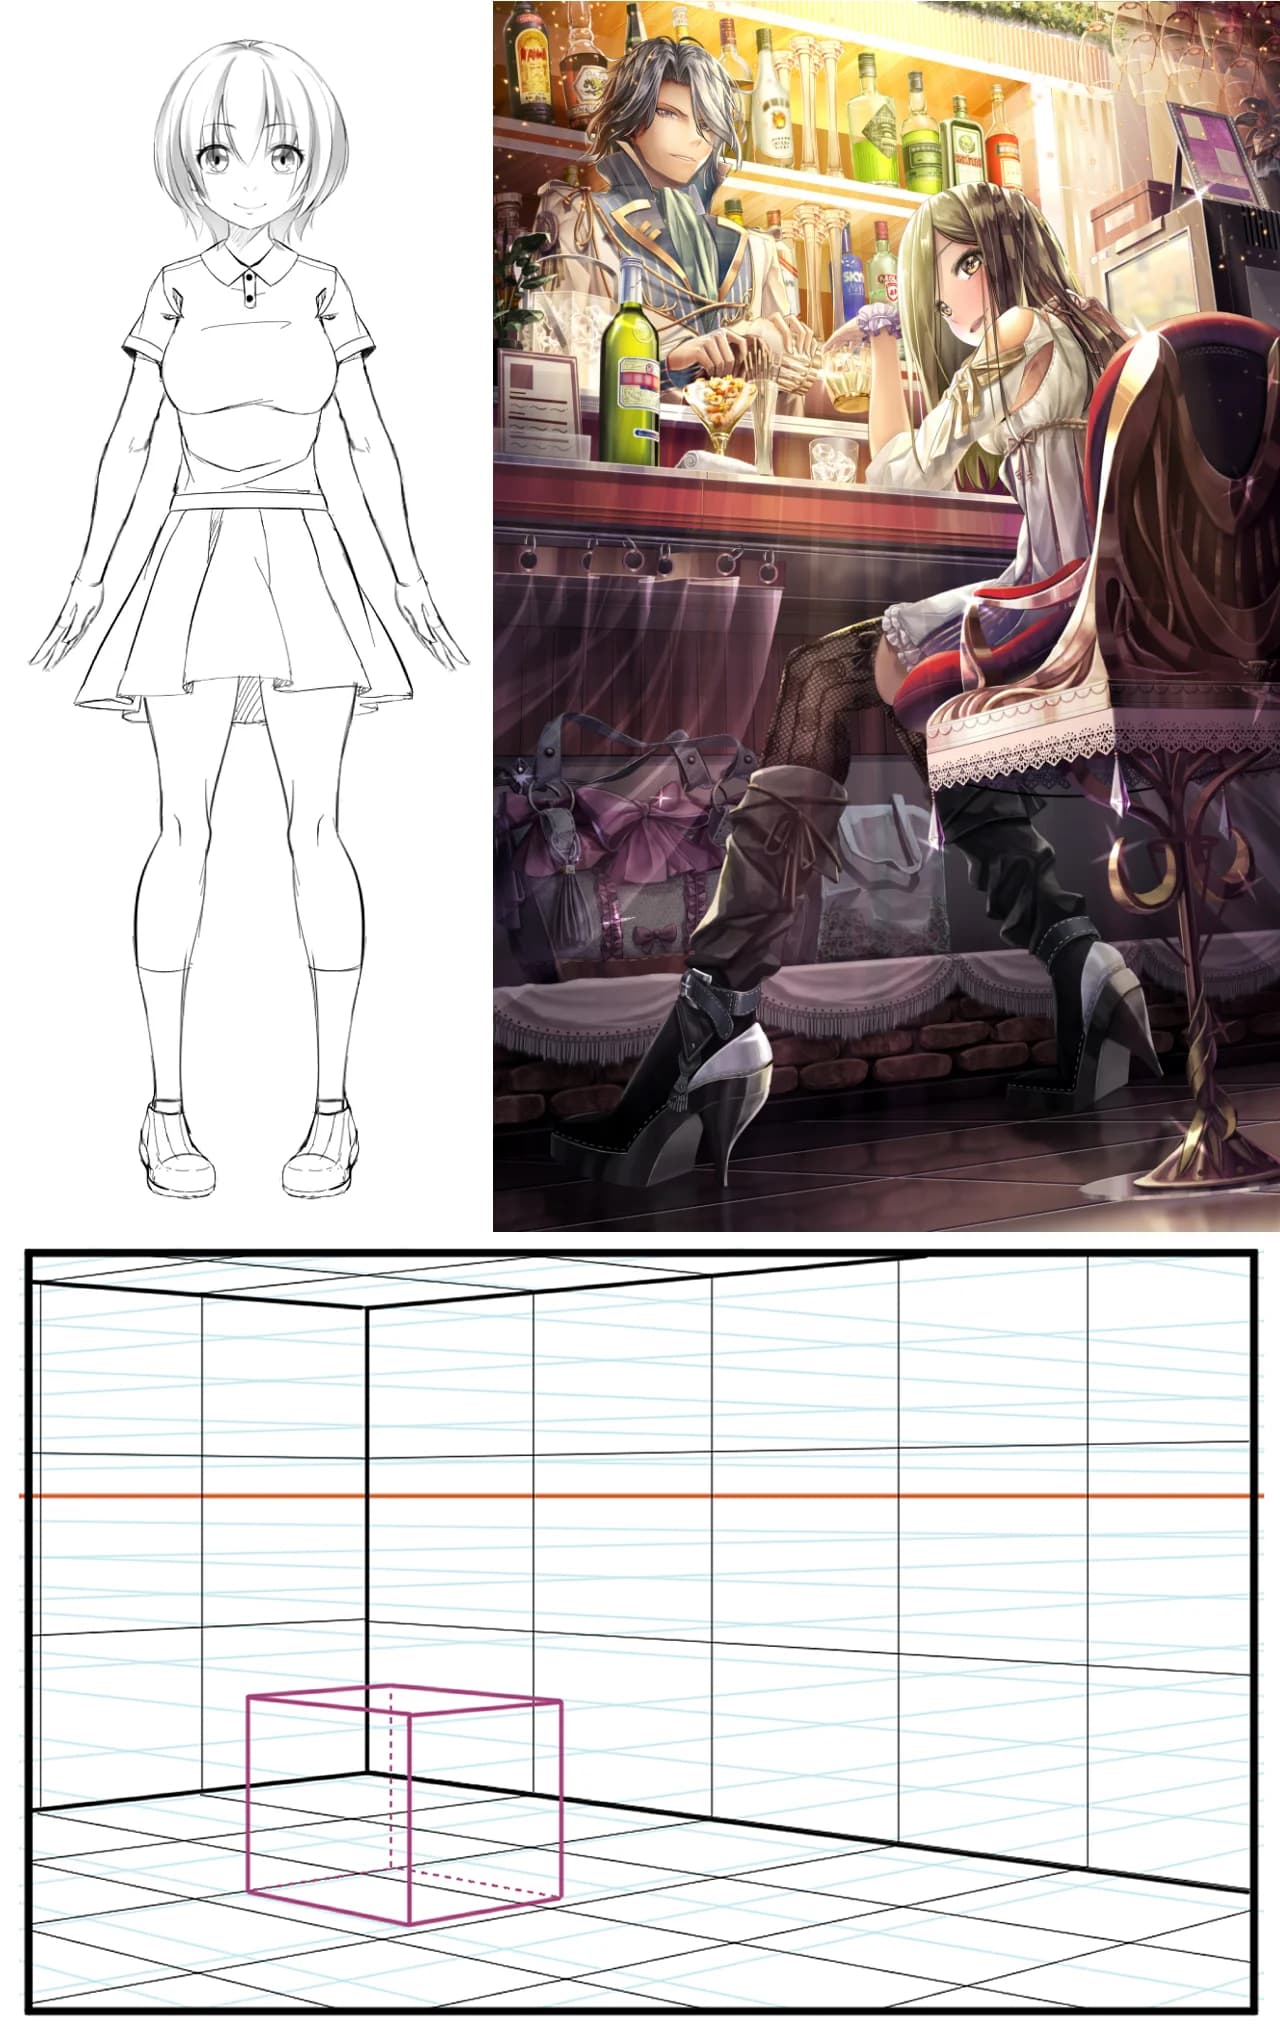
Move from "drawing by instinct" to "drawing with understanding"!
If you've just been drawing freely and don't know the technical side, or you're stuck wondering what to learn to level up, this course is for you. Maybe you don't even know how to start studying art in the first place—that's exactly why I recommend joining. Drawing on my own studies and over 10 years of experience teaching more than 1,000 students, I’ve refined this course to cover the common pitfalls learners face, including proportions, perspective, anatomy, 3D forms, coloring, and textures. You won't just learn the "right" way to draw; by analyzing common mistakes alongside correct examples, you'll gain a much deeper understanding of the core principles.
Follow 50+ hands-on exercises
1. Beginner Class (Foundations)
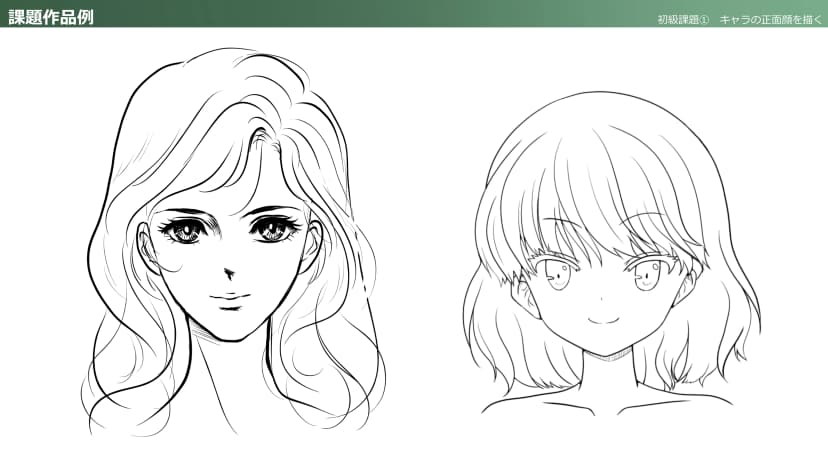
Let's draw a character's face from the front!
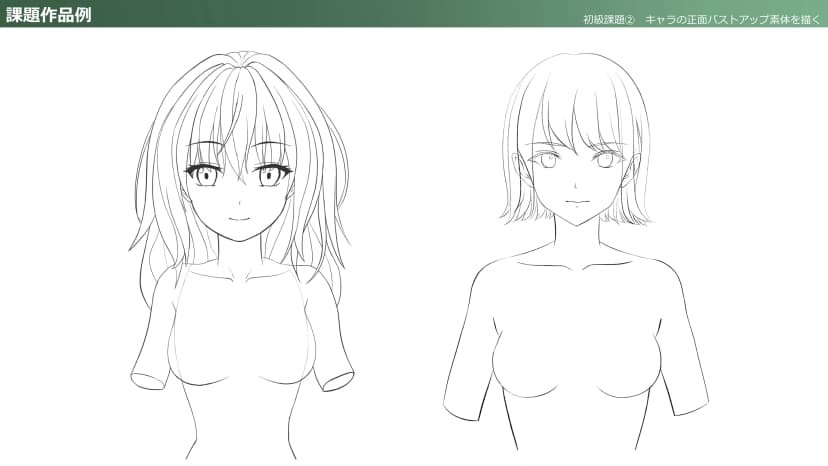
Let's draw a front-view bust-up character base!
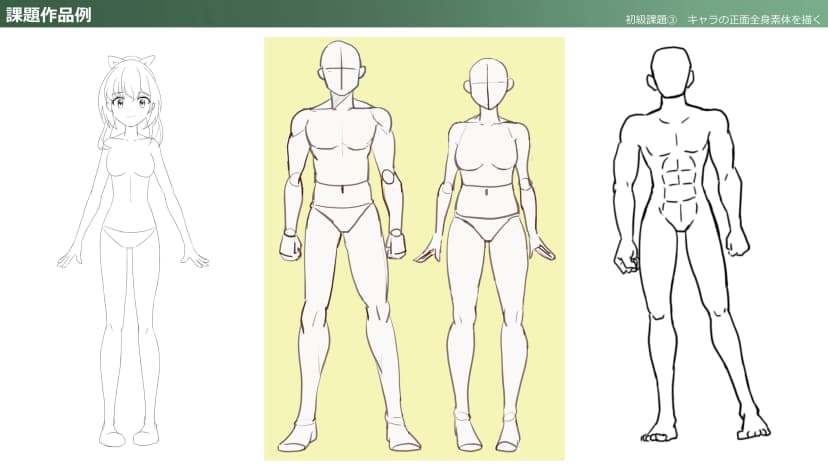
Draw a full-body character base from the front!
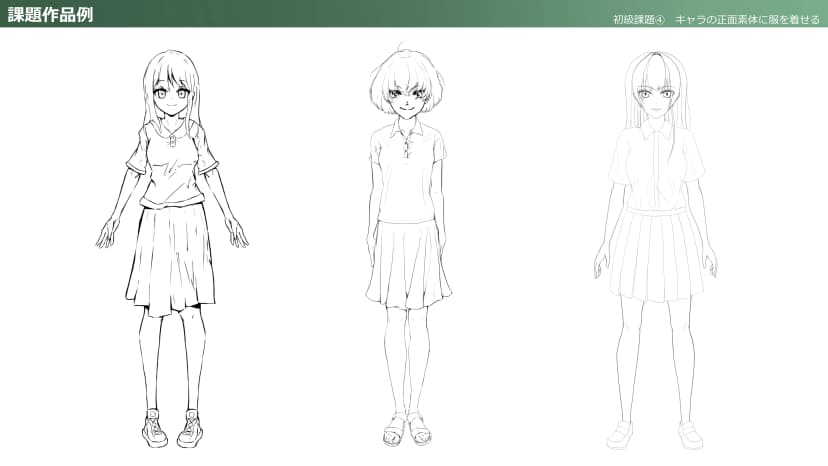
Dress your character's full-body base!
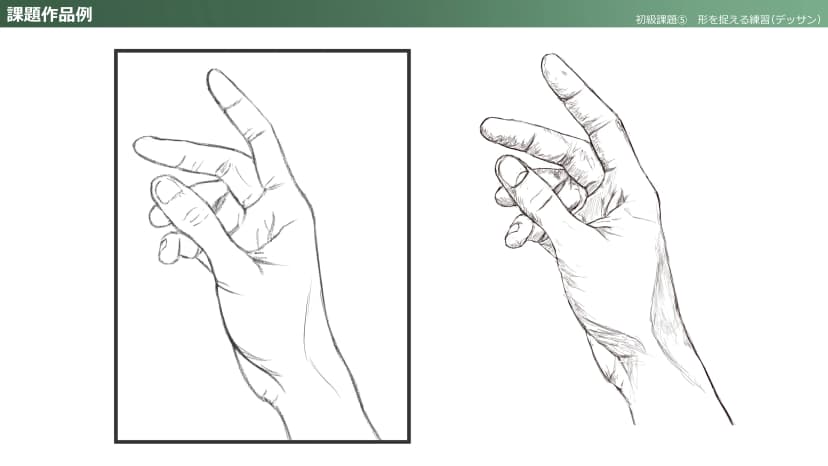
Practice capturing shapes (Hand sketching)

Try color studies!
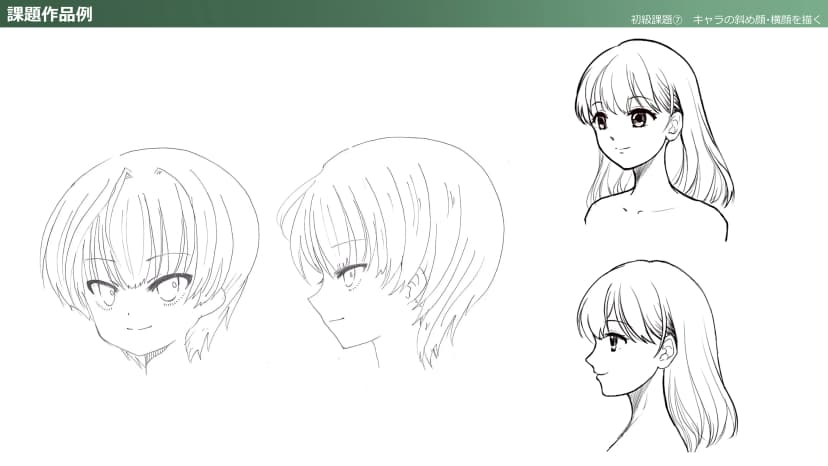
Let's draw 3/4 and profile views of character faces!
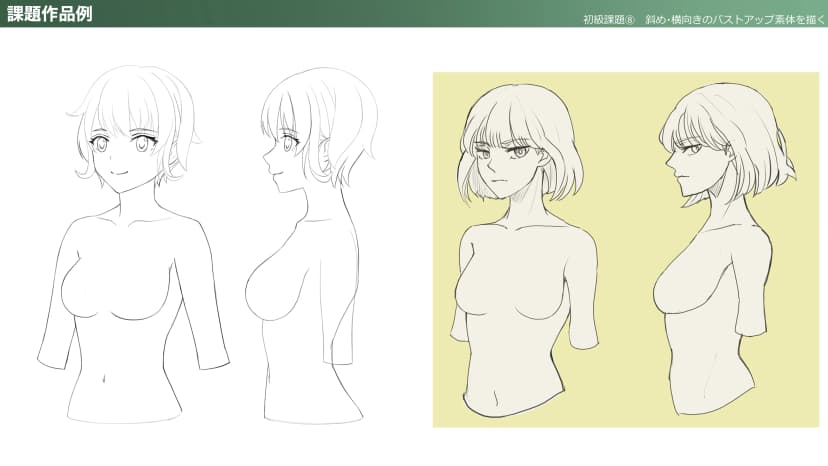
Let's draw bust-up perspective and profile sketches!
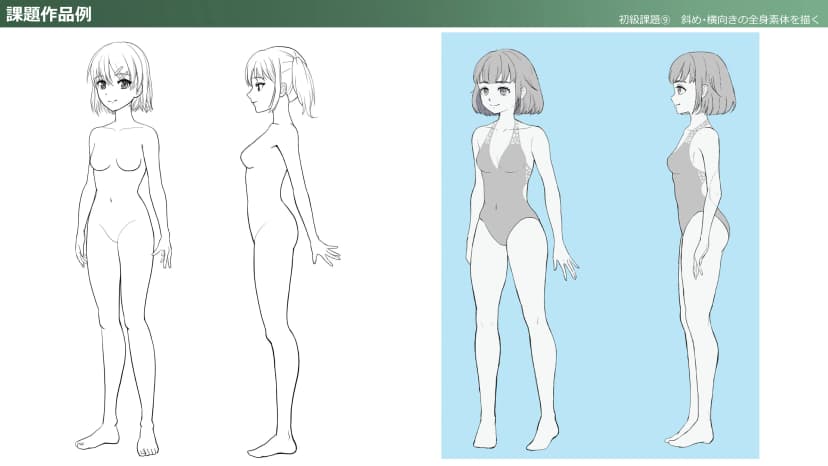
Draw a full-body base from 3/4 and profile views!
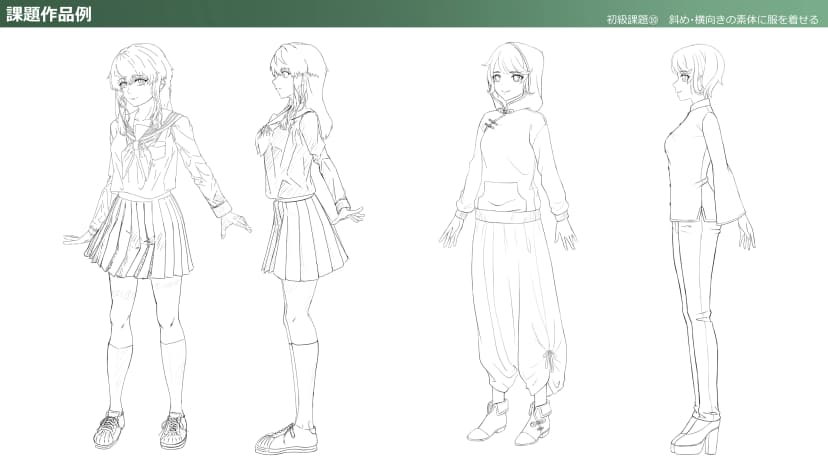
Dress the body from diagonal and side angles!
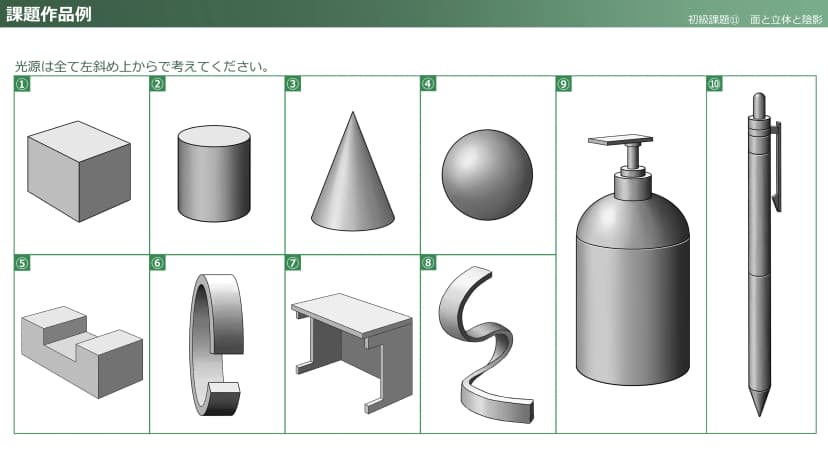
Planes and Shading
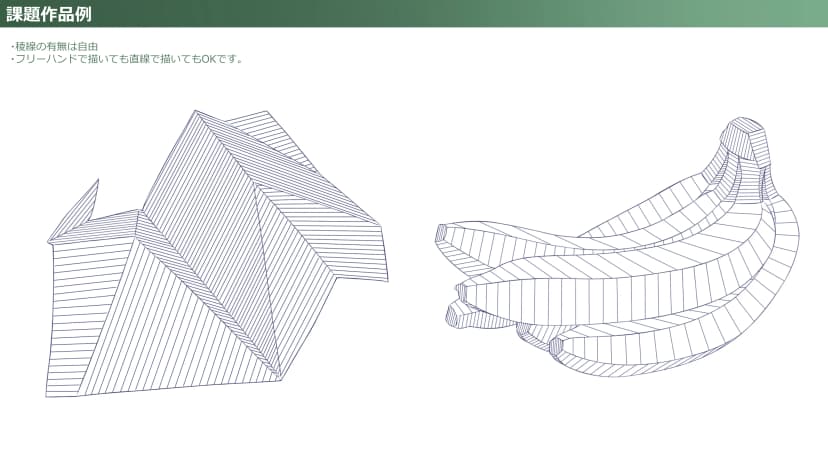
Surface and Brushstroke
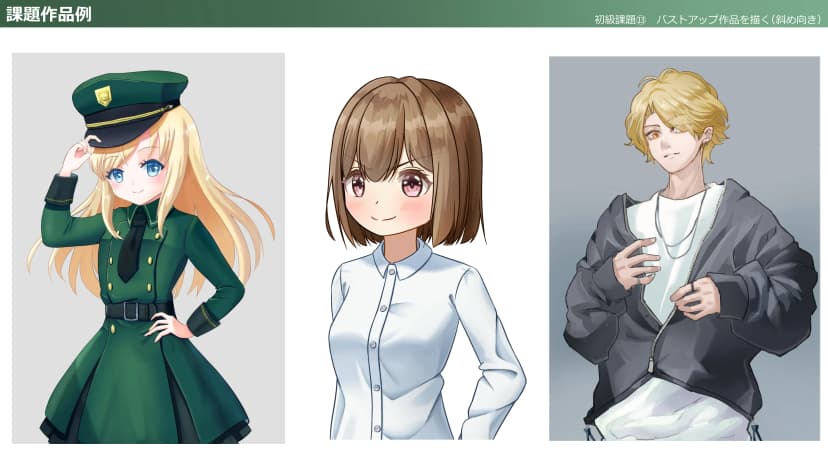
Draw a bust-up illustration!
2. Intermediate Class (Skill Development)
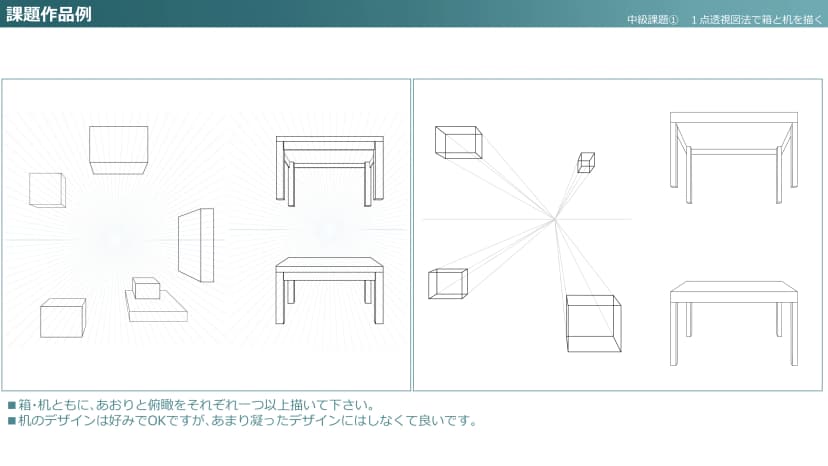
Draw a box and desk using one-point perspective!
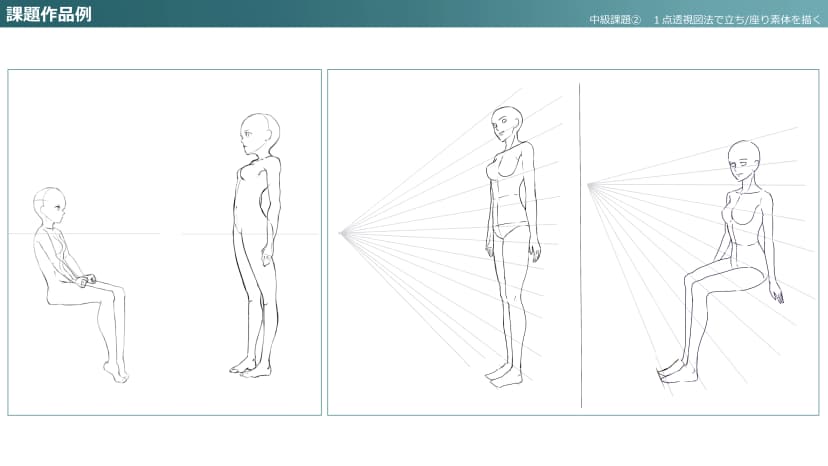
Drawing Standing and Sitting Bases with One-Point Perspective!
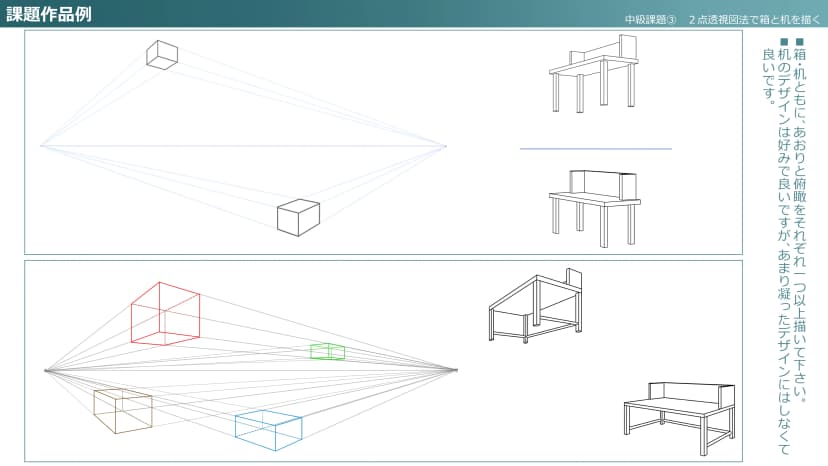
Drawing a box and desk with two-point perspective
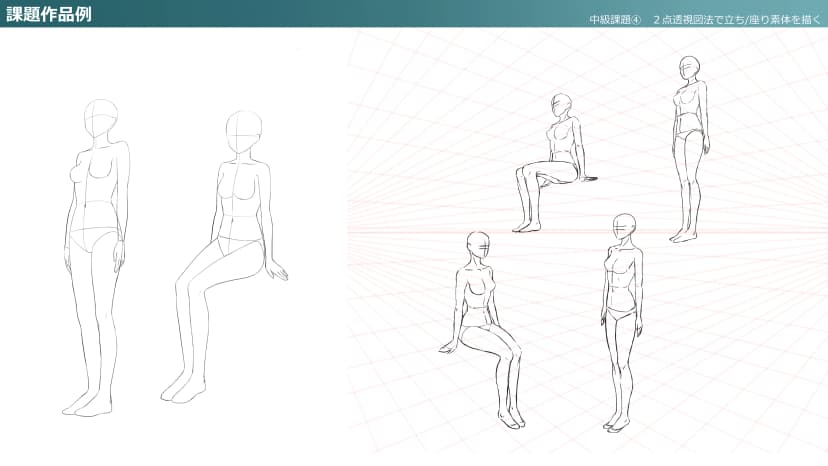
Draw standing and sitting bases using 2-point perspective!
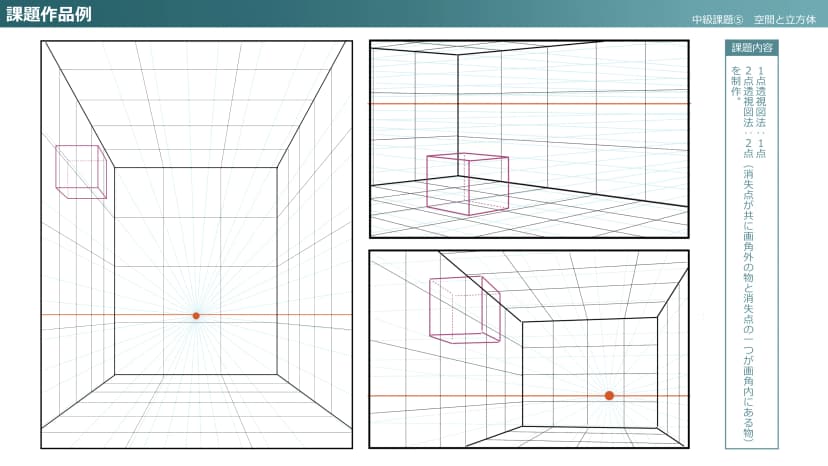
Space and Cubes
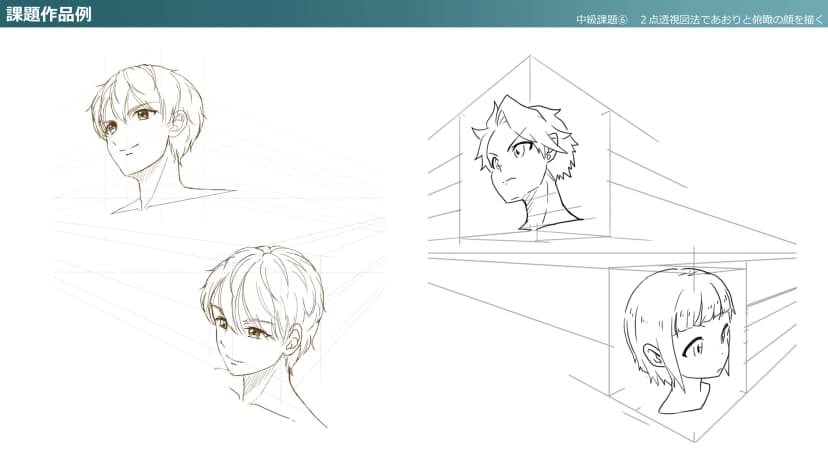
Draw low-angle and high-angle faces using two-point perspective!
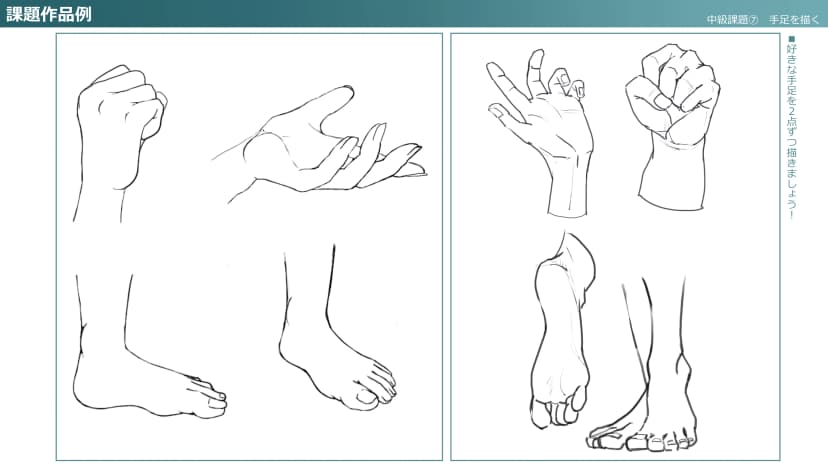
Let's draw hands and feet!
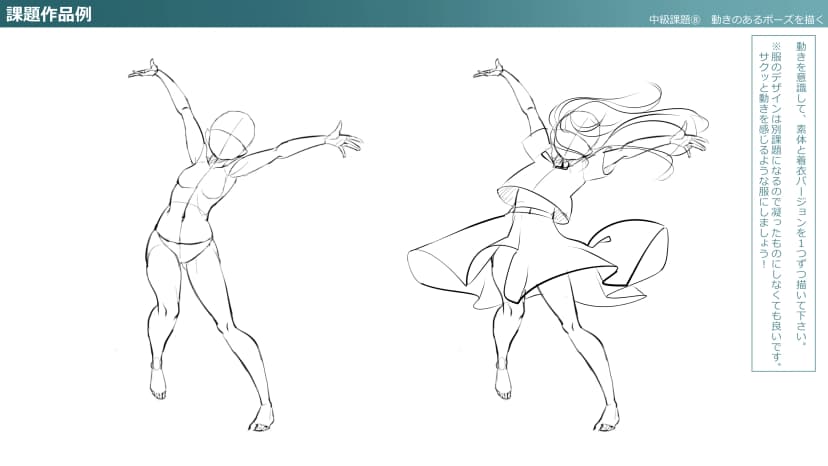
Draw poses with movement!
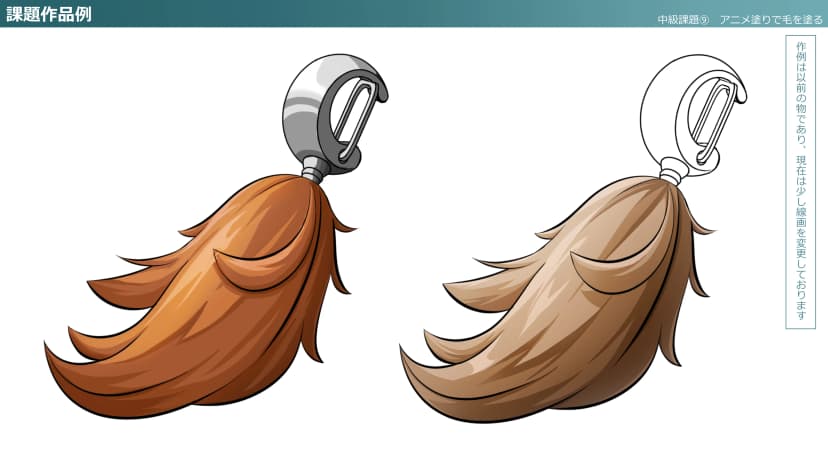
Paint hair using anime-style cel shading!
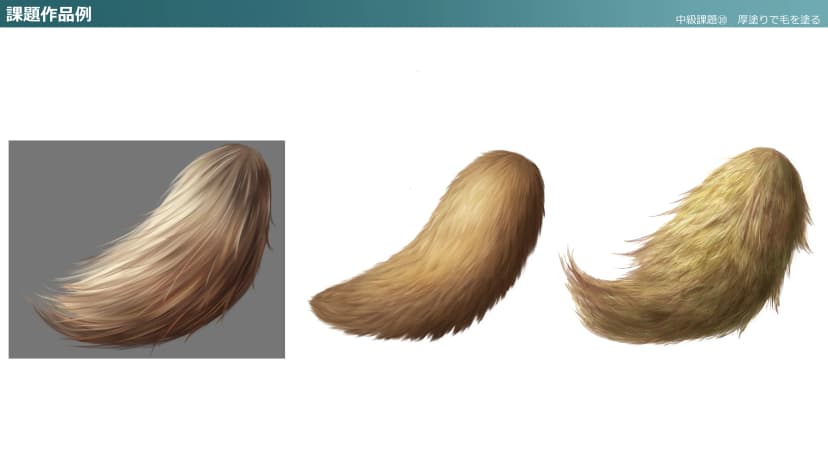
Paint hair with the thick painting style!

Let's express textures!
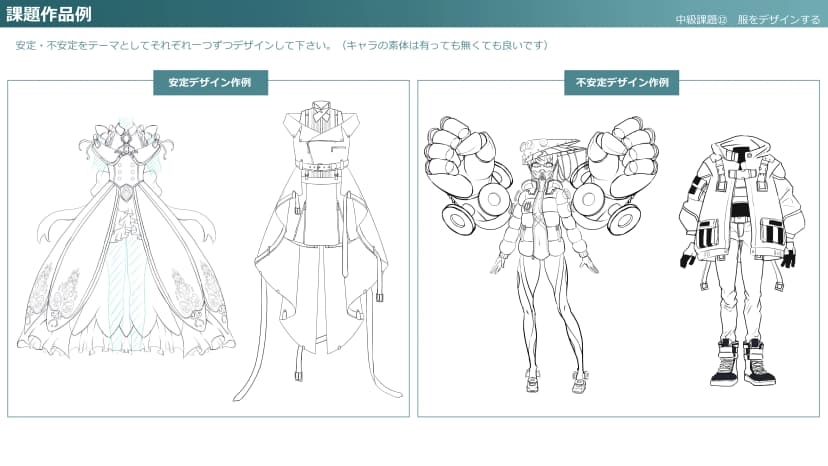
Let's design some clothes!
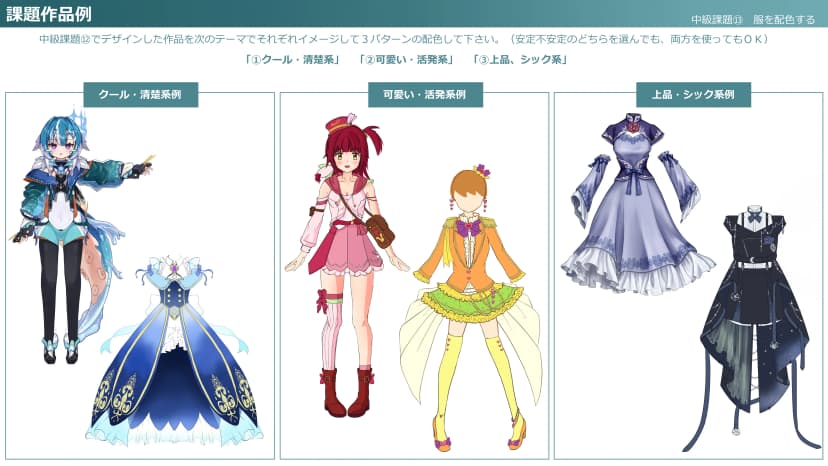
Let's color the clothes!
3. Advanced Class (Practice)
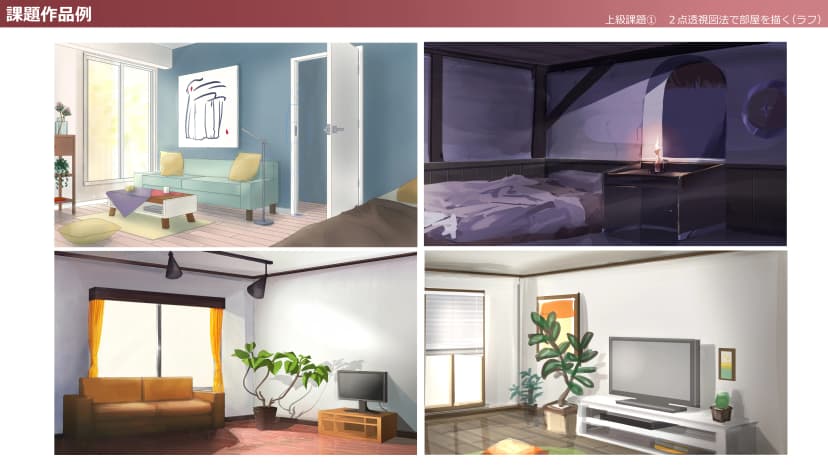
Draw a room using two-point perspective (Sketching phase)
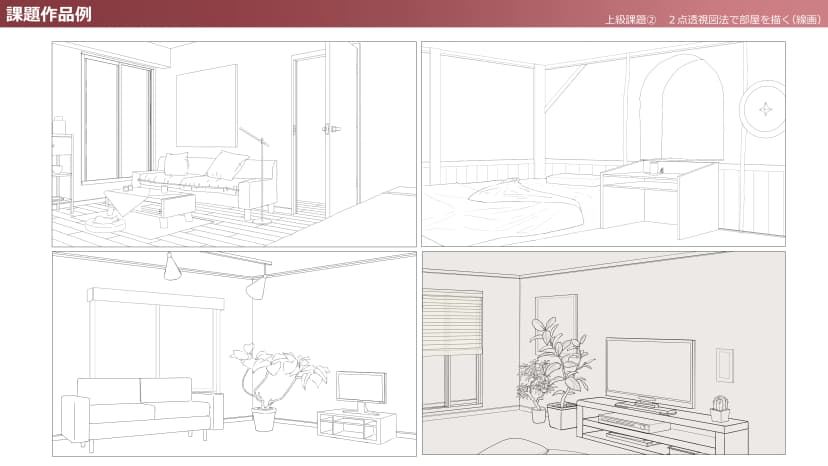
Draw a room with two-point perspective (Line art)
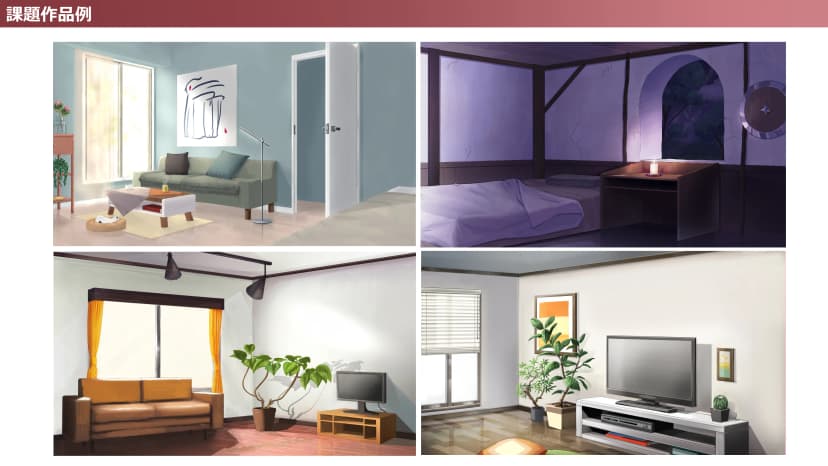
Drawing a room with two-point perspective (Coloring)
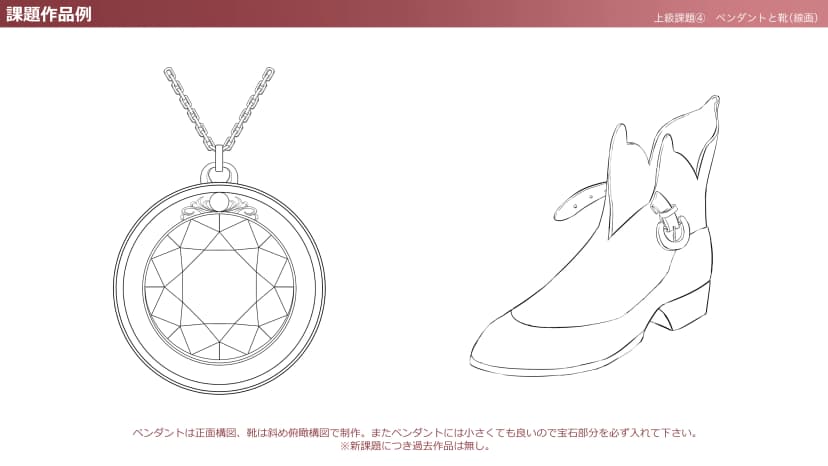
Let's draw the pendant and shoes! (Line art)

Let's paint the pendant and shoes!
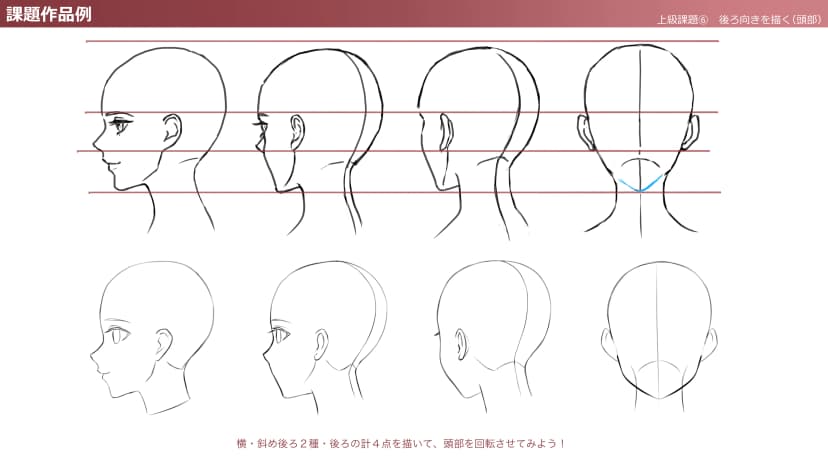
Let's draw a head from behind!
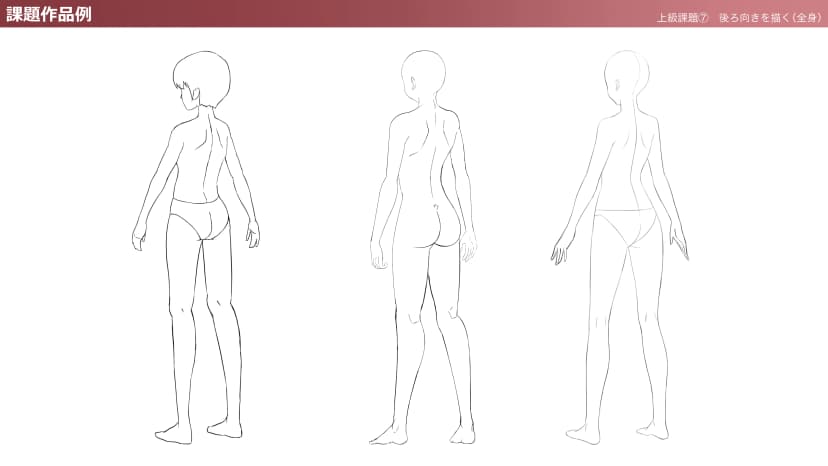
Draw the body from behind!
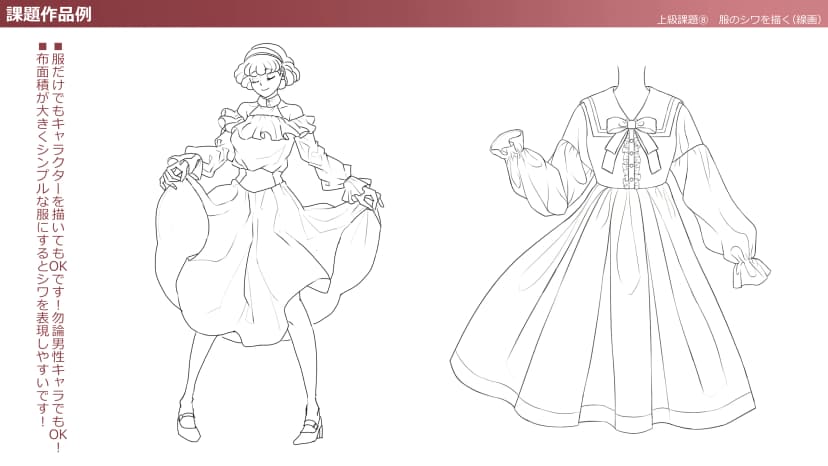
Draw clothing folds! (Line Art)
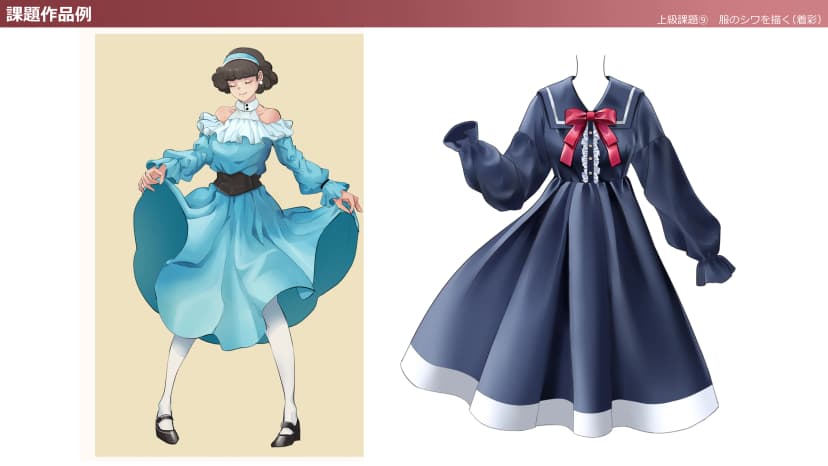
Draw Clothing Folds! (Coloring)
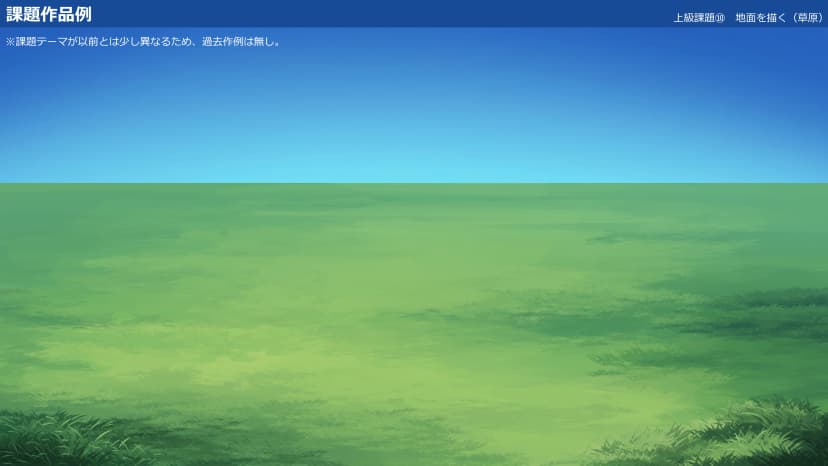
Draw the ground (grassland)!
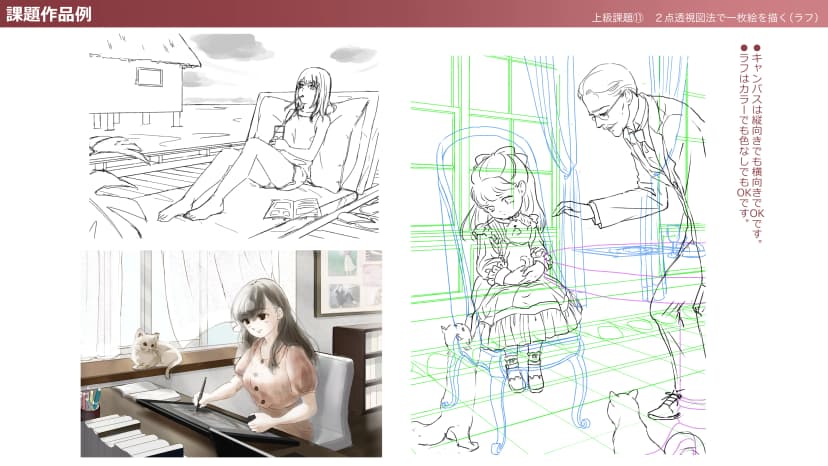
Drawing an illustration with two-point perspective (Sketching phase)
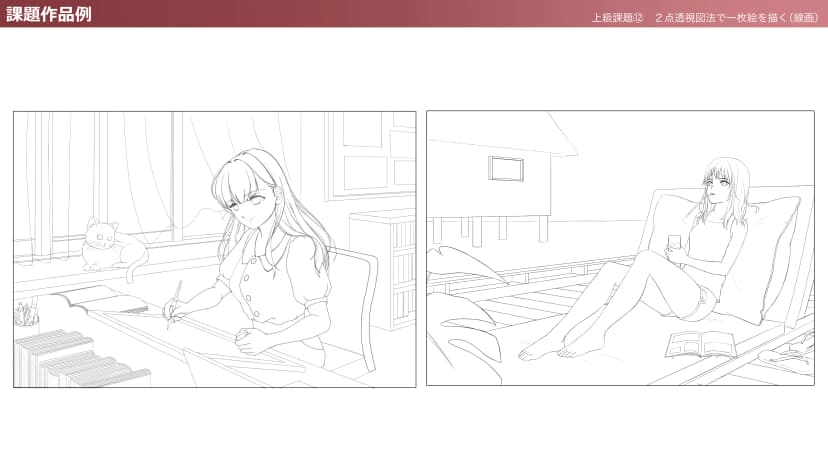
Drawing an illustration with two-point perspective (Line art)
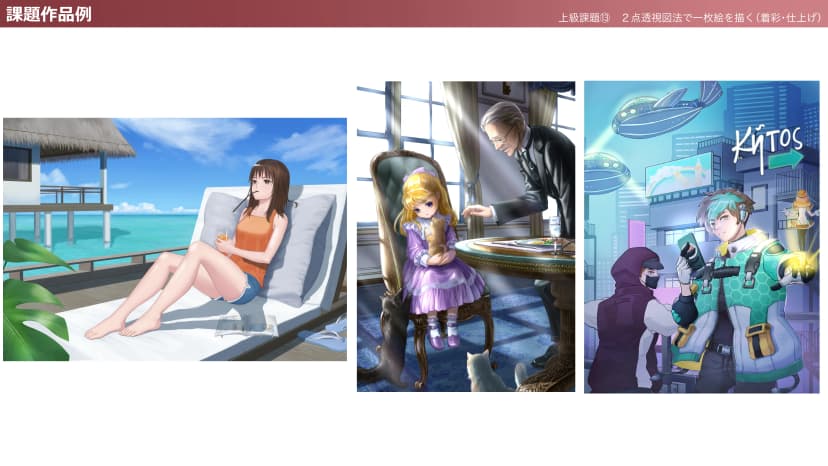
Create a full illustration using two-point perspective! (Coloring)
4. Advanced Class (Application)
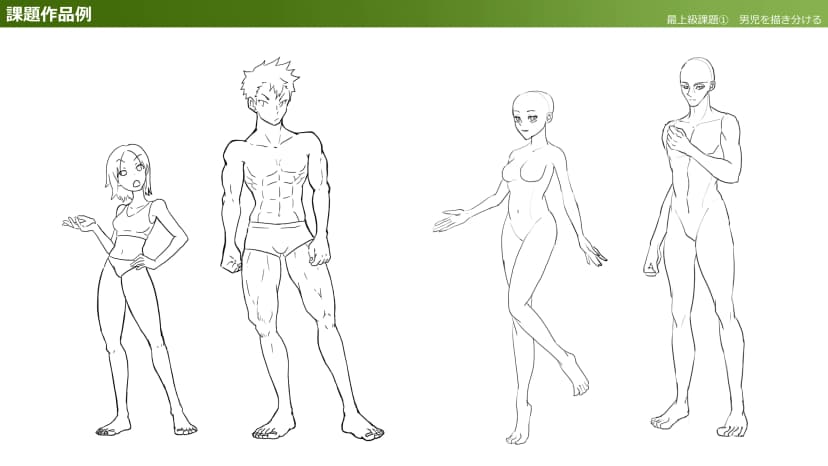
Master drawing male and female characters!
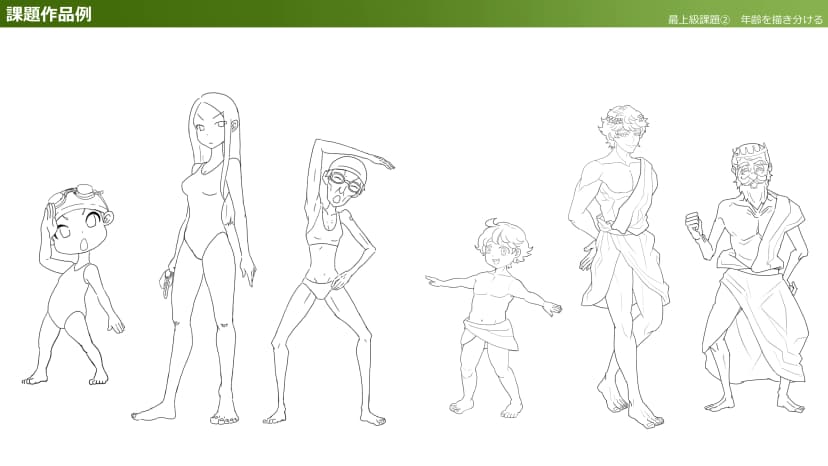
Learn to draw different ages!
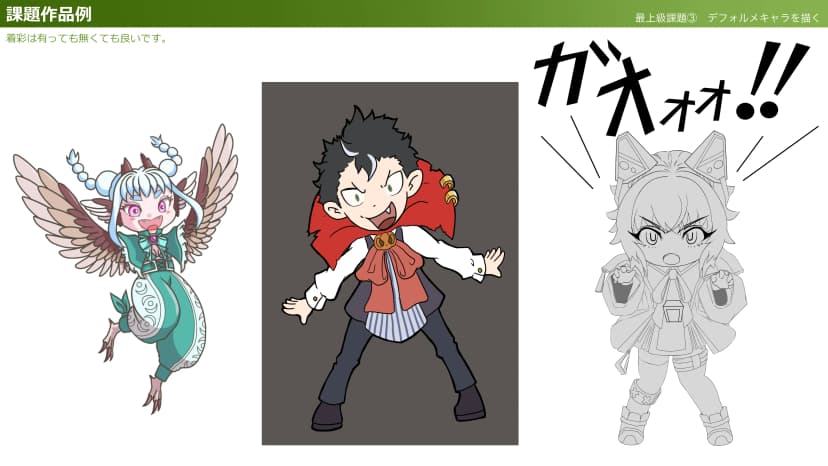
Draw Chibi Characters!
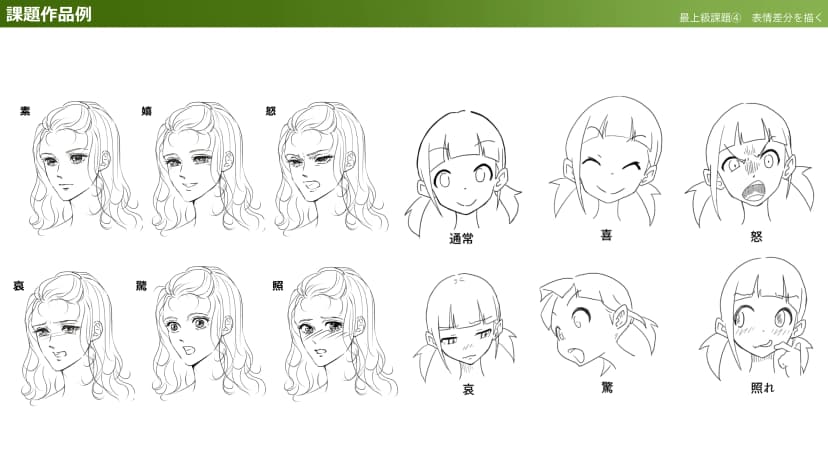
Draw different facial expressions!
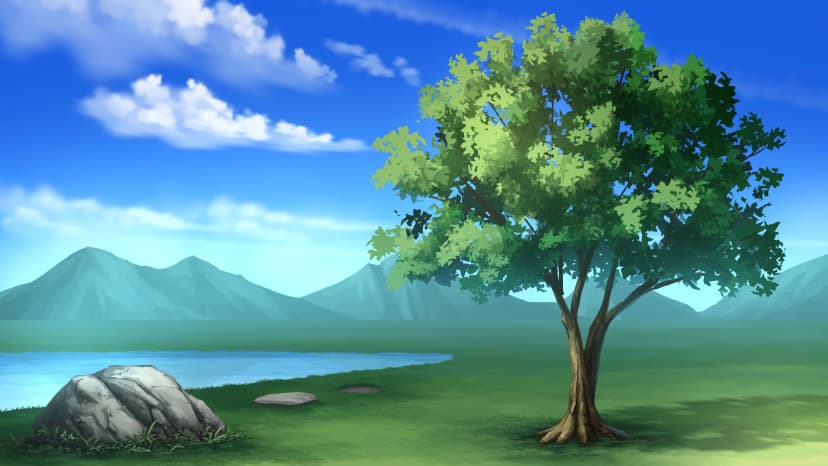
Let's draw natural backgrounds!
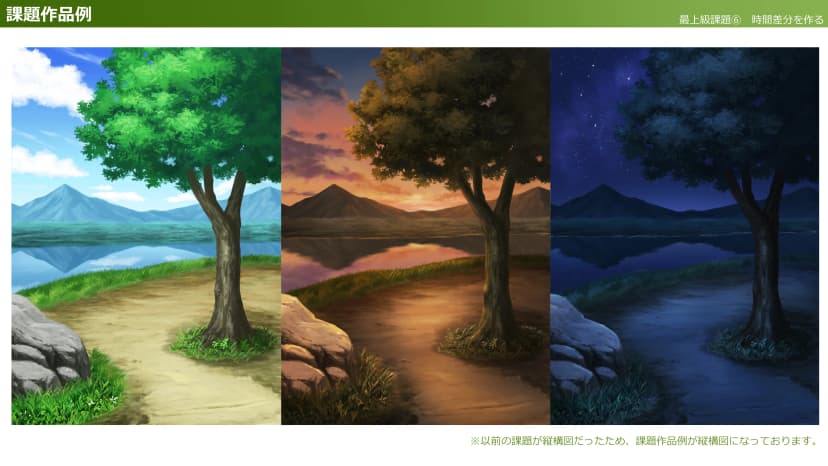
Create time variations!
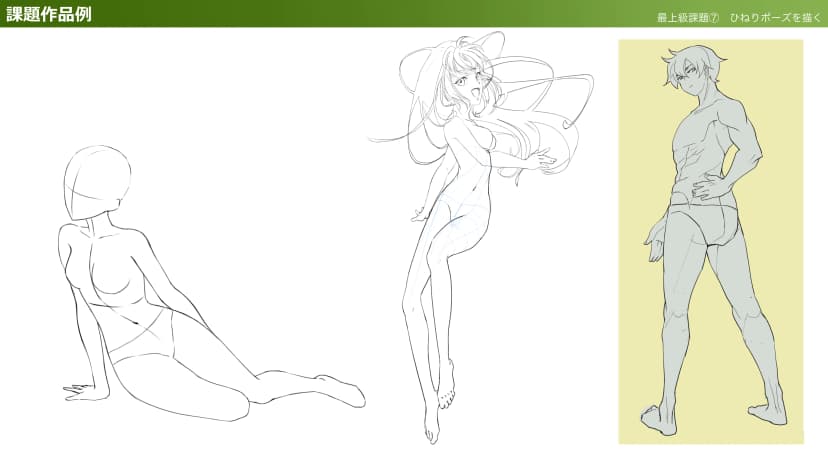
Draw a twisted pose!
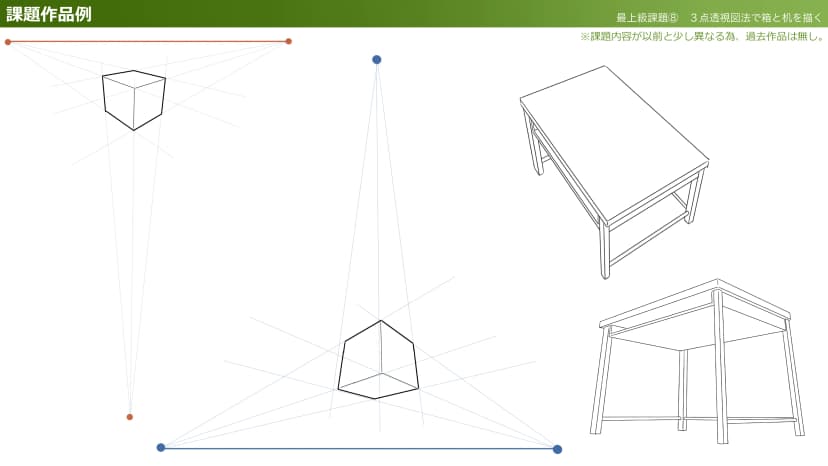
Draw a box and desk using three-point perspective!
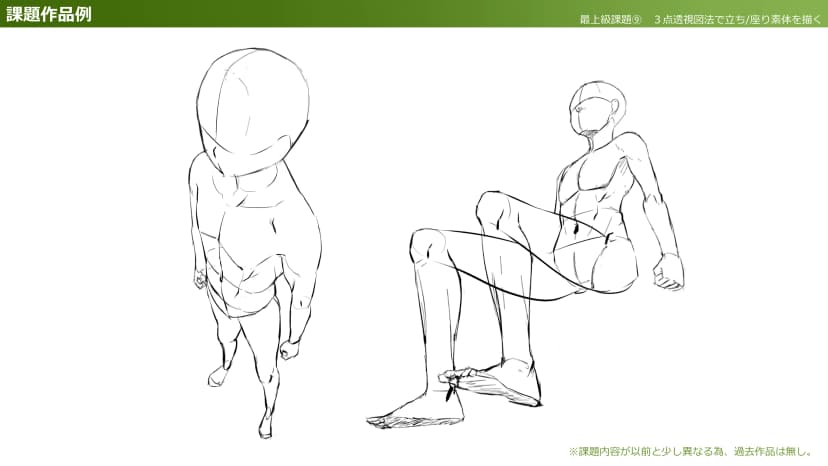
Draw standing and sitting figures using three-point perspective!
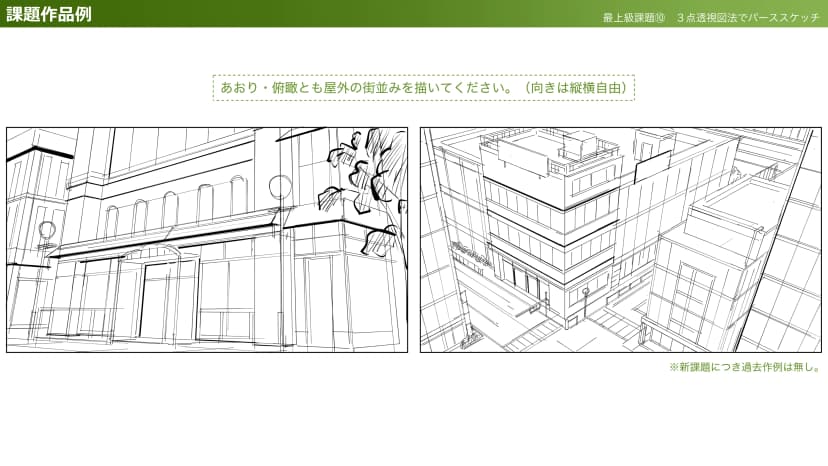
Try perspective sketching with 3-point perspective!
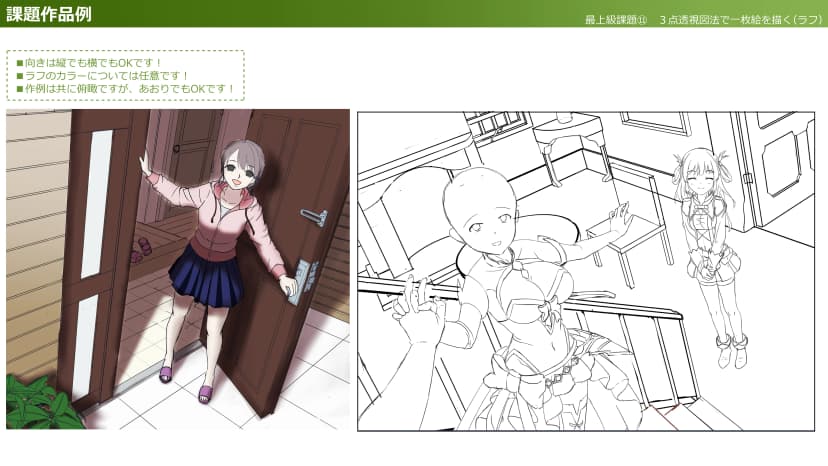
Create a full illustration using 3-point perspective (Rough draft phase)
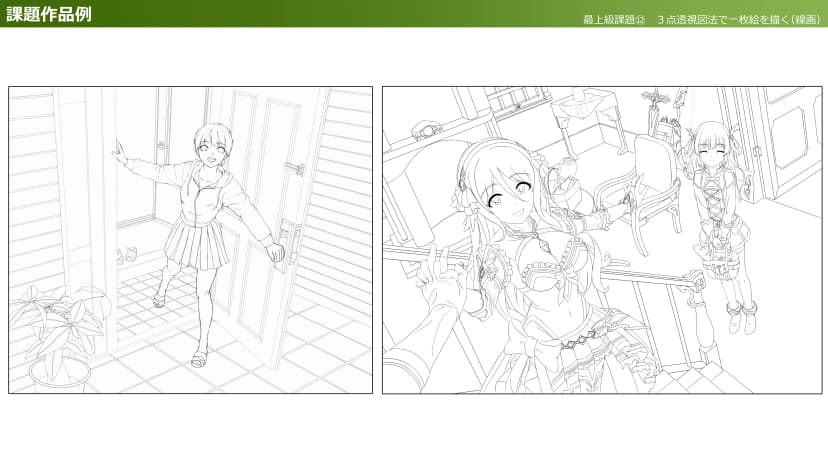
Drawing an Illustration with 3-Point Perspective (Line Art Part)
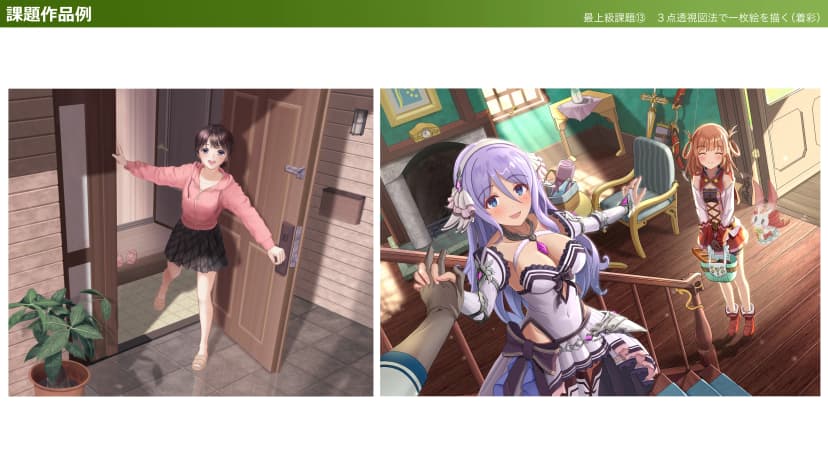
Draw a full illustration with 3-point perspective! (Coloring)
Who should take this course?
Beginners who've just started drawing character illustrations
Anyone looking for a systematic way to learn illustration skills
Artists who can already draw but want to take their work to the next level
Meet your instructor

takaillust
Illustrator, Game Graphic Artist, and Illustration Instructor
Previously an R&D engineer at a major corporation, I later attended an illustration vocational school to become a professional illustrator. As a game graphic artist, I've worked on card illustrations, characters, backgrounds, item assets, and chibi illustrations across various projects. Recently, I've been active as an instructor, teaching at vocational schools, Palmie, Posemaniacs, professional seminars, and YouTube. My illustration career required me to handle a wide range of genres and styles, making it vital to logically understand the "how-to" and turn it into a repeatable process. Drawing from that experience, my strength lies in teaching logically rather than relying on intuition alone.
Experience
- Basics of Coloring in CLIP STUDIO PAINT: Examples of What to Do and What to Avoid – Mynavi Publishing
- Illustration courses (Palmie, POSEMANIAX, etc.)
- Character illustration (Touhou LostWord, August Cinderella Nine, 100 Sleeping Princes and the Kingdom of Dreams, etc.)
- Background illustrations (Quiz RPG: The World of Mystic Wiz, Food Wars!: Shokugeki no Soma, etc.)
- Kyushu University Faculty of Engineering, Osaka Animator College
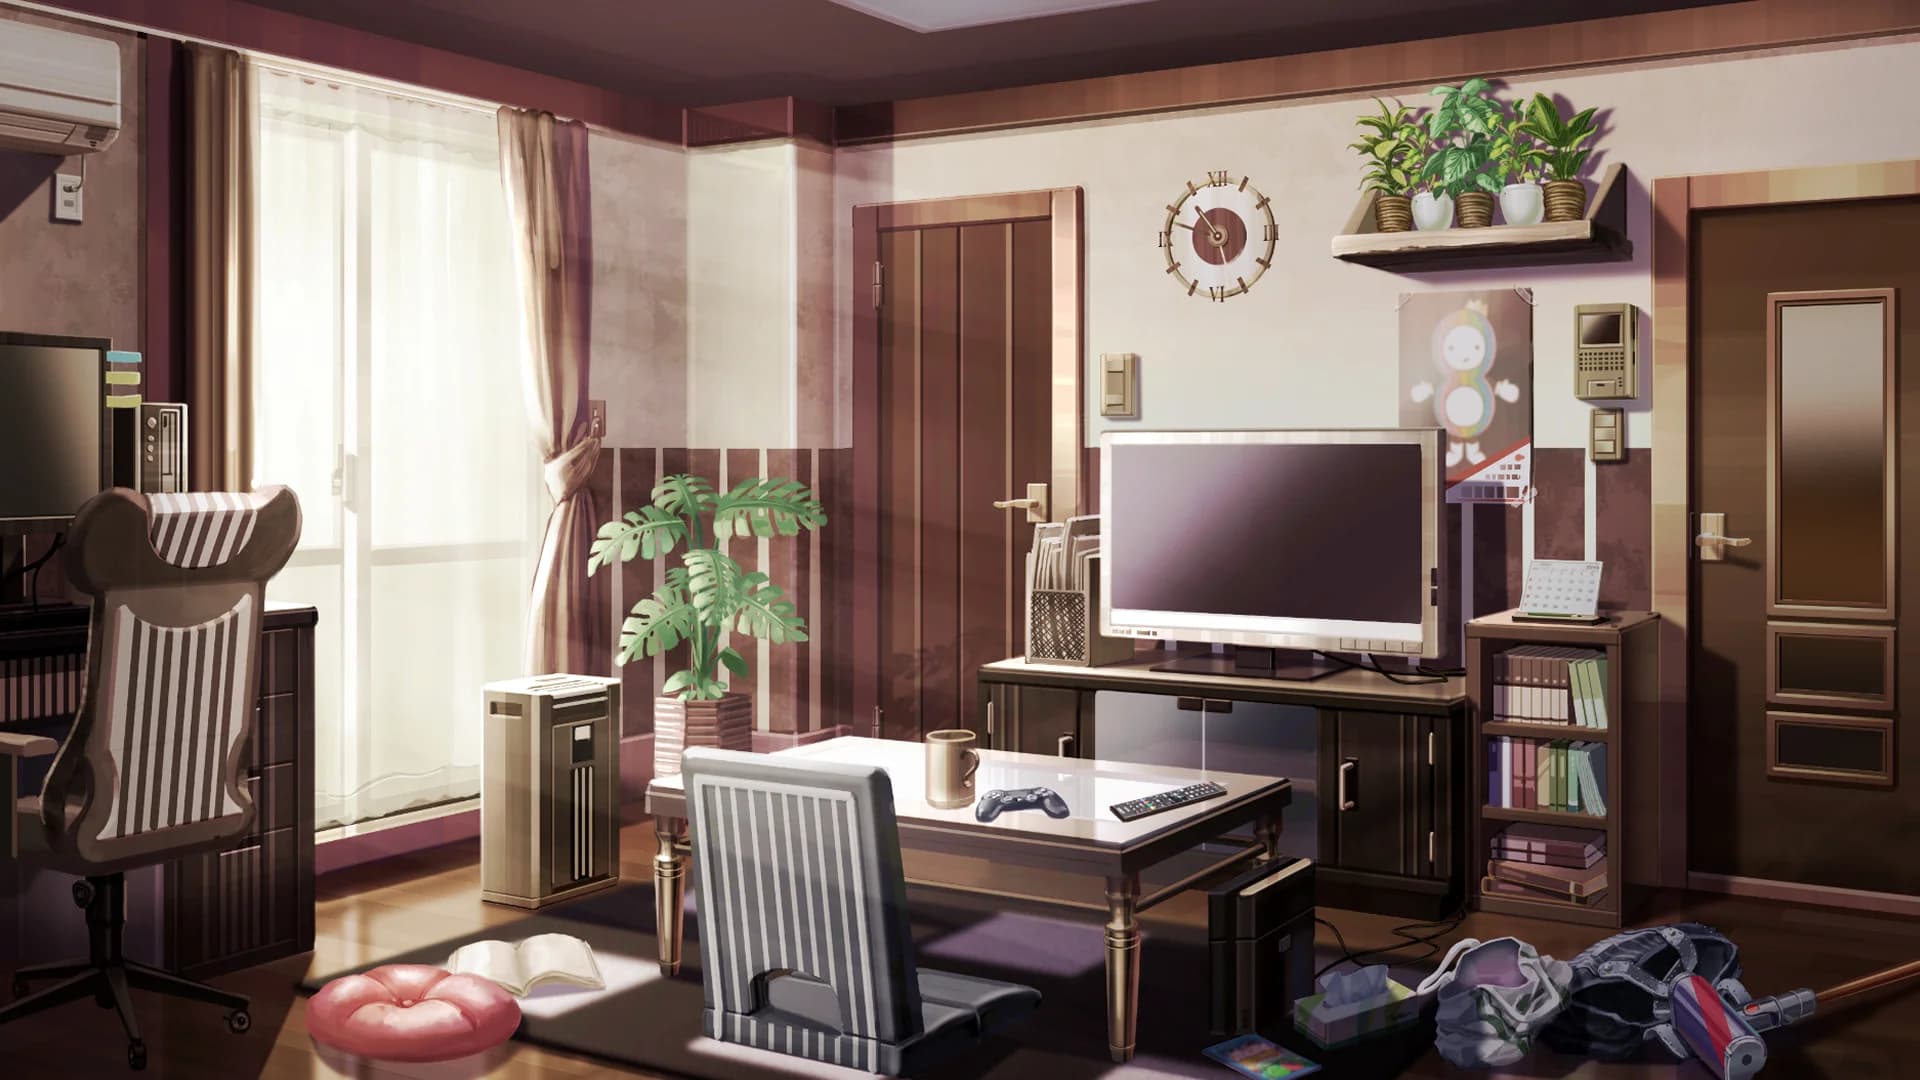
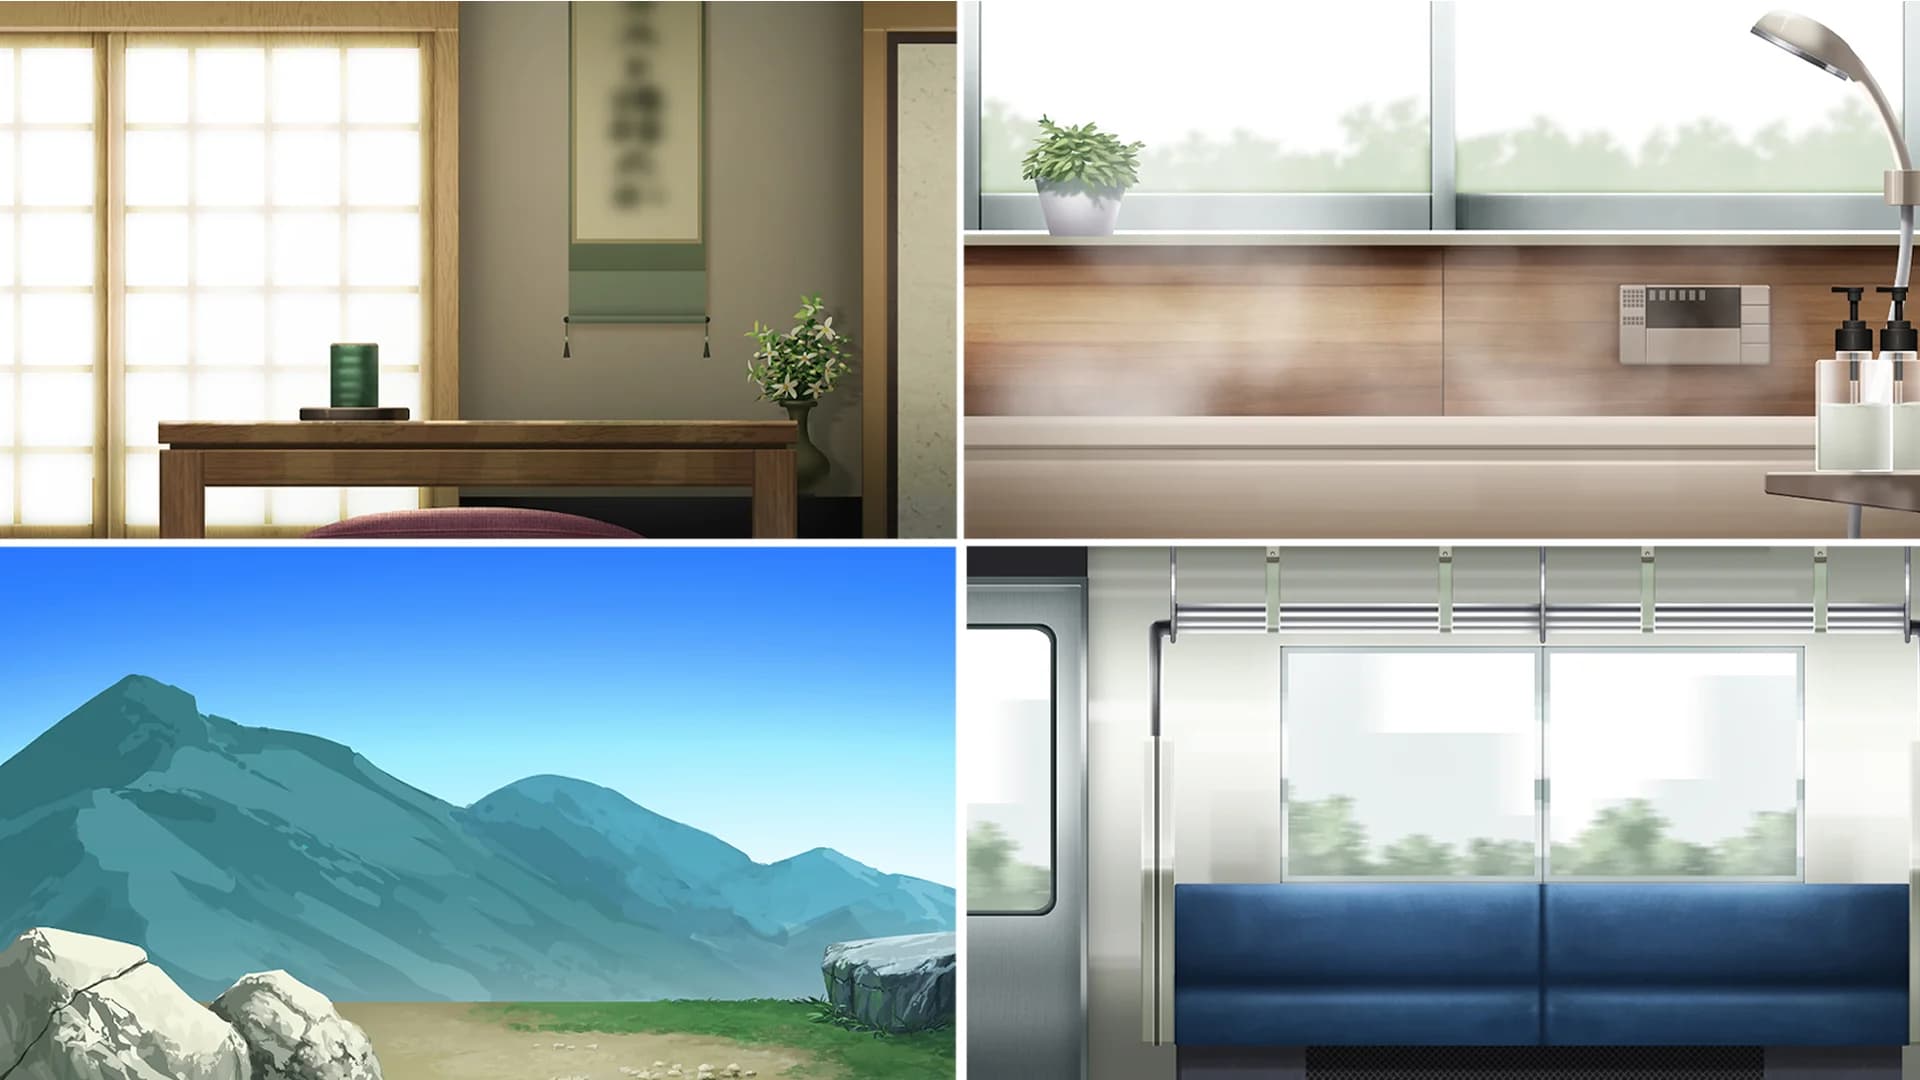
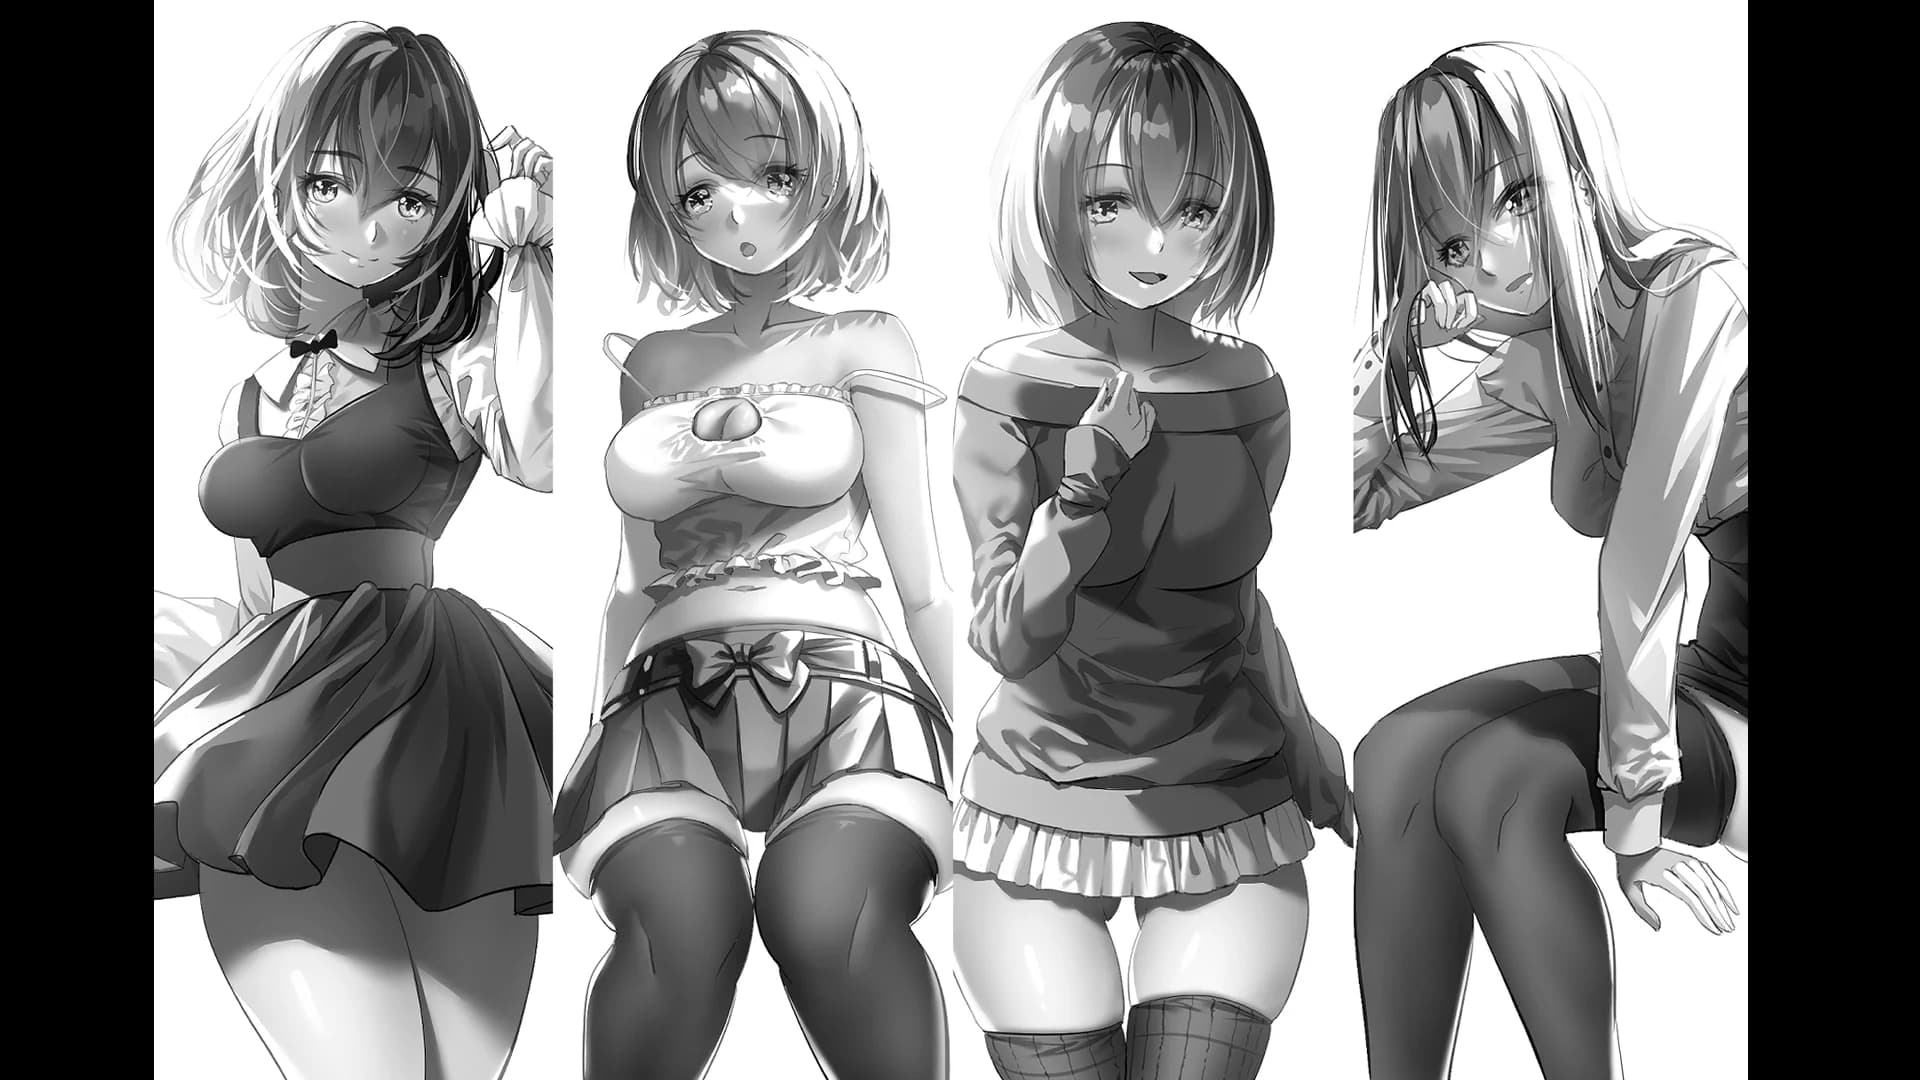
Selected works by takaillust, Illustrator, Game Graphic Artist, and Illustration Instructor


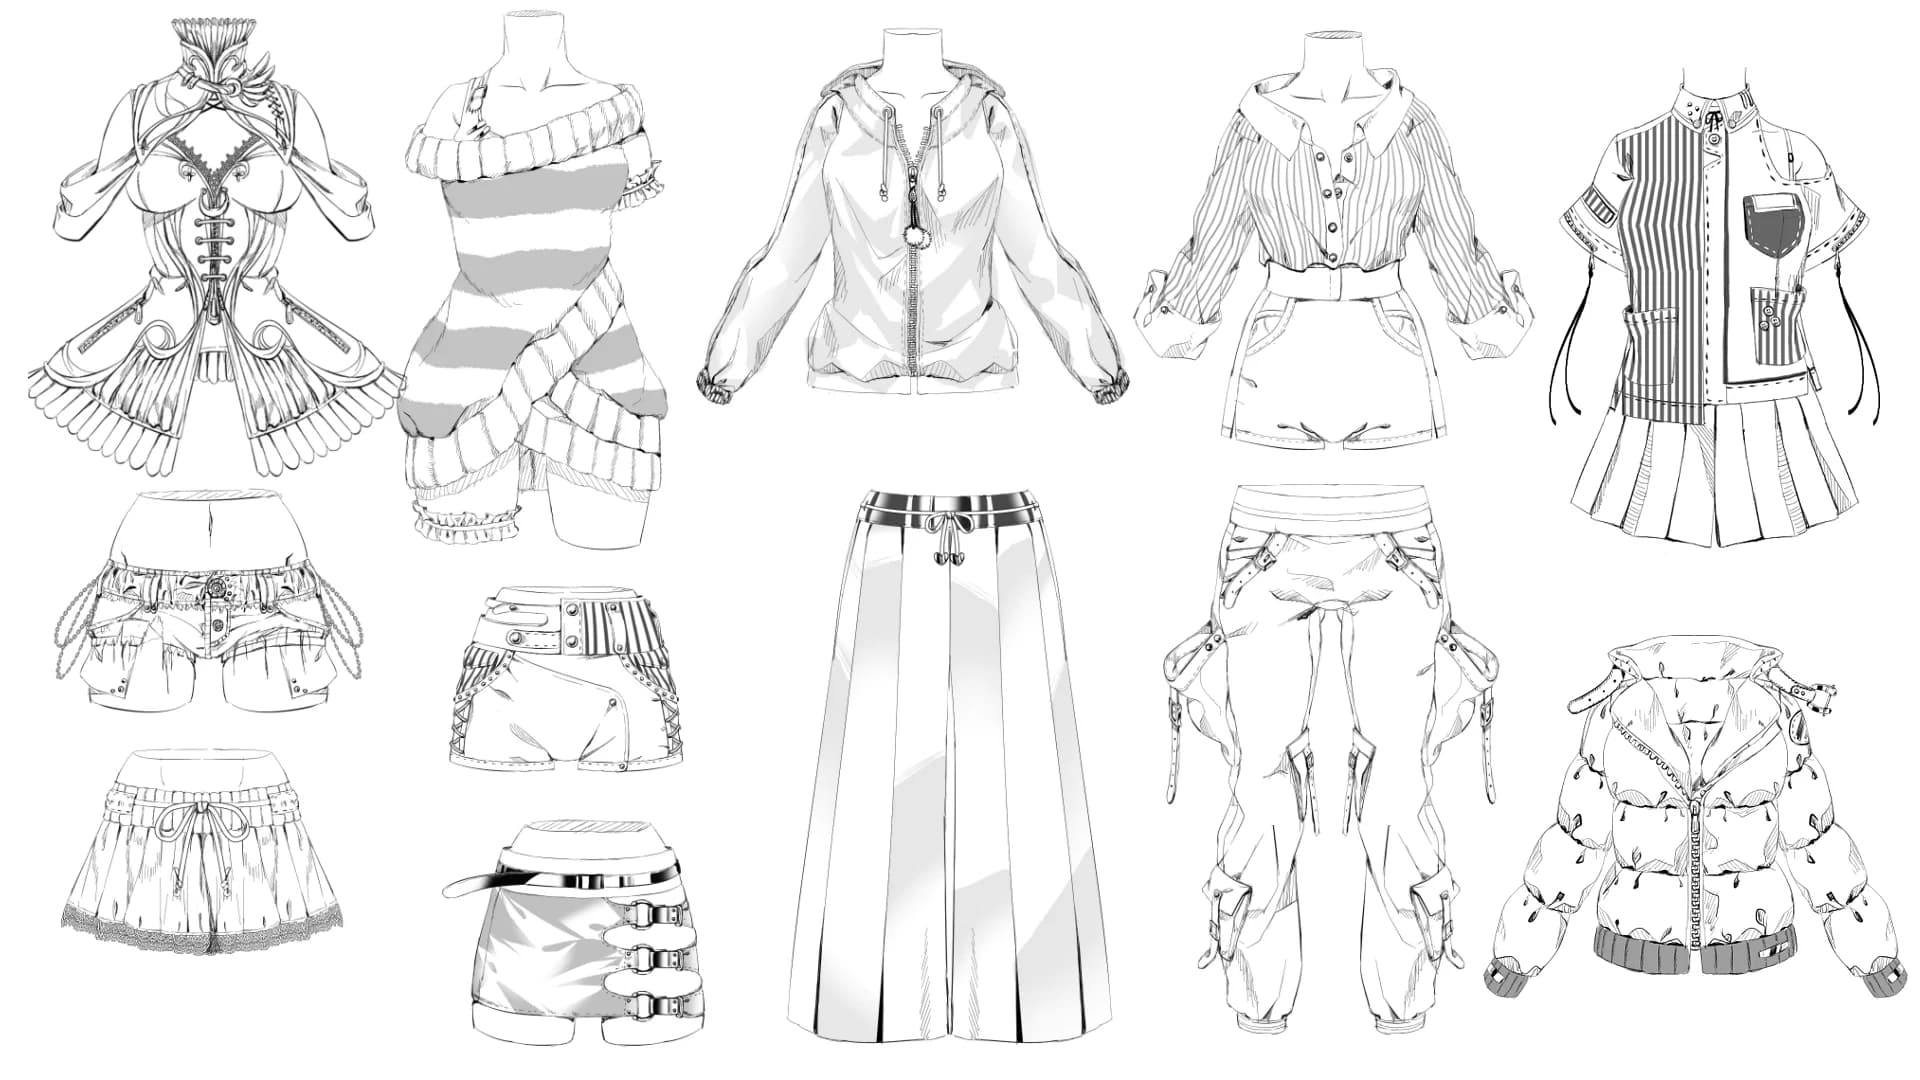

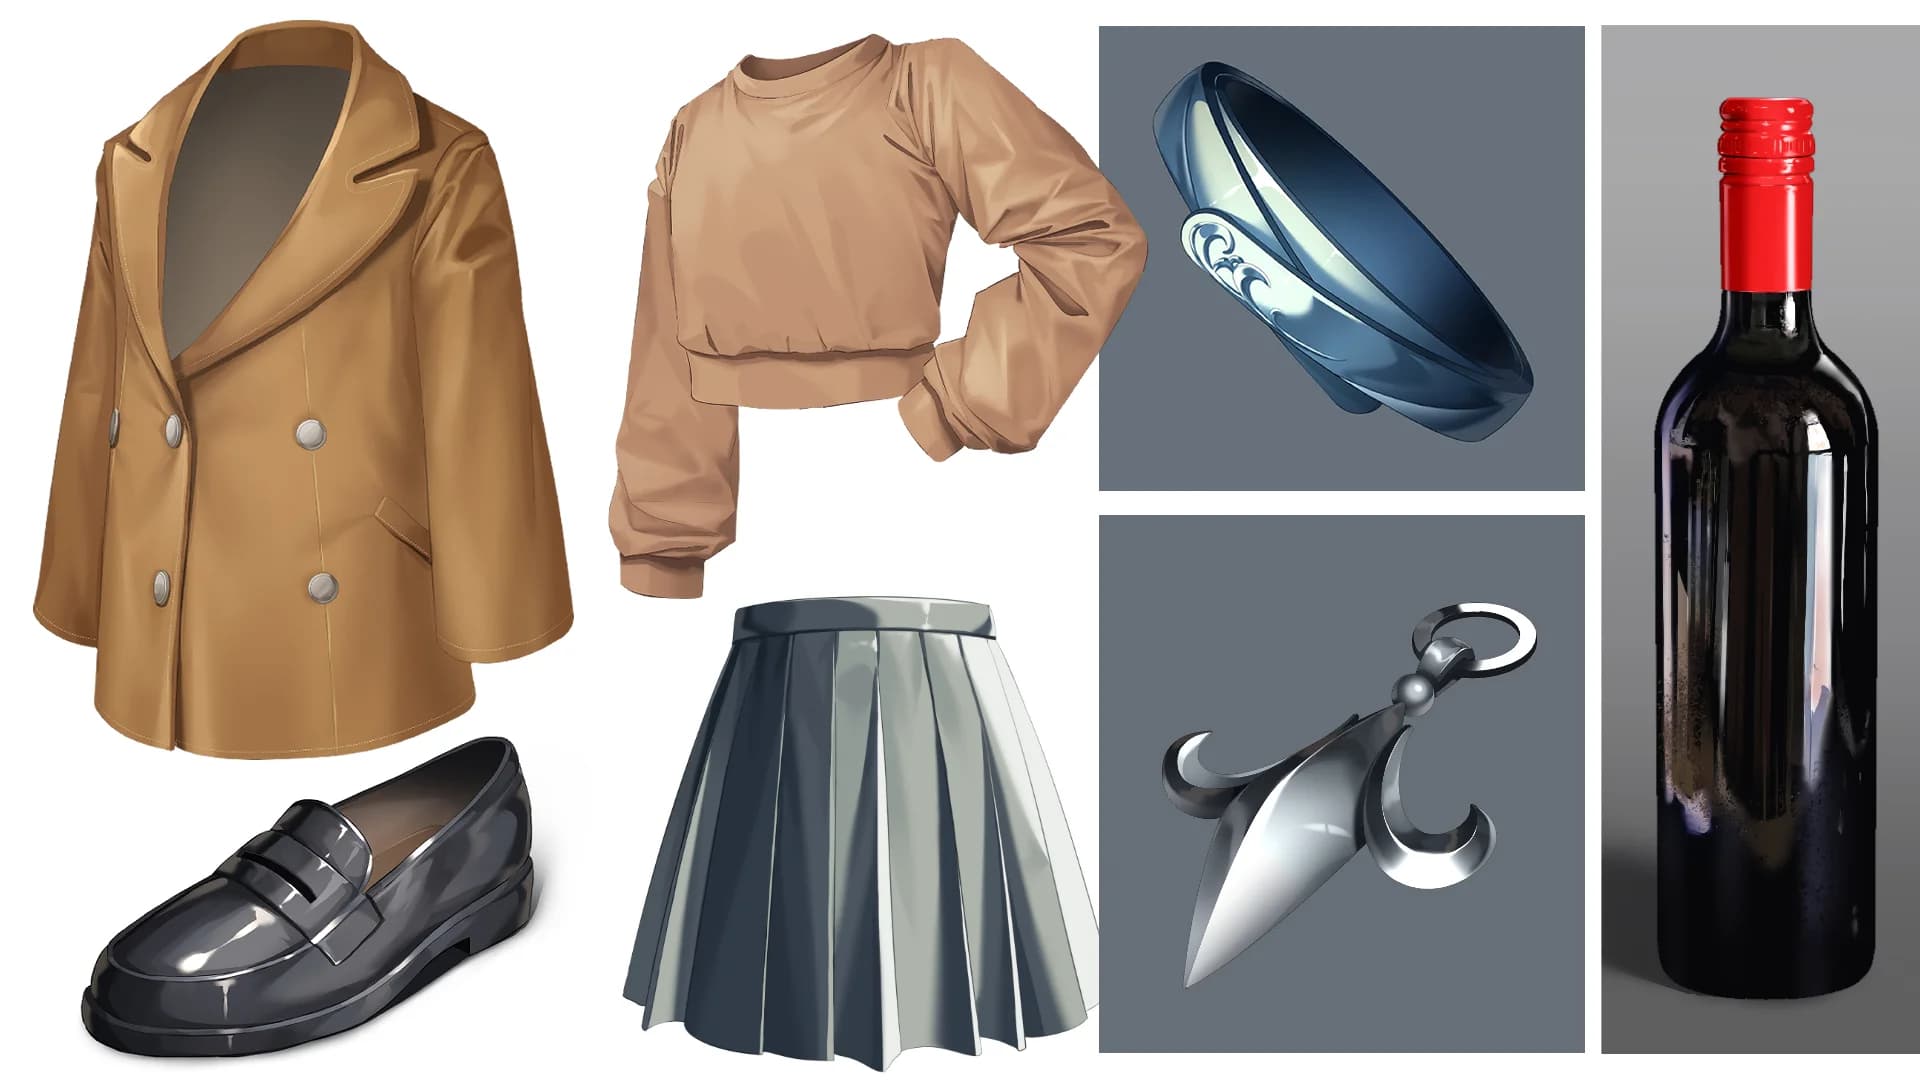
Interview with takaillust, Illustrator, Game Graphic Artist, and Illustration Instructor
What inspired you to teach this theme?
While there's a lot of art learning content out there, I wanted to create a place where you can learn everything in a step-by-step format. Also, because I've worked across so many genres and styles as an illustrator, I'm often asked to lead classes for almost any category—a rarity for an instructor. This course is the result of that diverse experience.
What was your biggest challenge while learning illustration? How did you overcome it?
Managing my own personality. In the art world, people often talk about 'right-brained' vs. 'left-brained' types, but both are essential to create great work. Improvement comes from understanding your own type and strengthening your opposite skills, but this isn't something you can gain simply through repetitive practice or memorization like technical knowledge. You have to reflect on your personal habits and lifestyle, then change them bit by bit.
What's the most important thing you focus on when finishing a piece of art?
To put it simply: finishing it! The biggest secret to improving is completing many works; there are so many things you can only learn by reaching the finish line. Of course, finishing a piece is tough, and you might feel like quitting halfway or giving up when things aren't going well. Even then, keep that mindset of pushing through to the end!
Course highlights
Discover what makes this course unique and the key skills you'll develop.
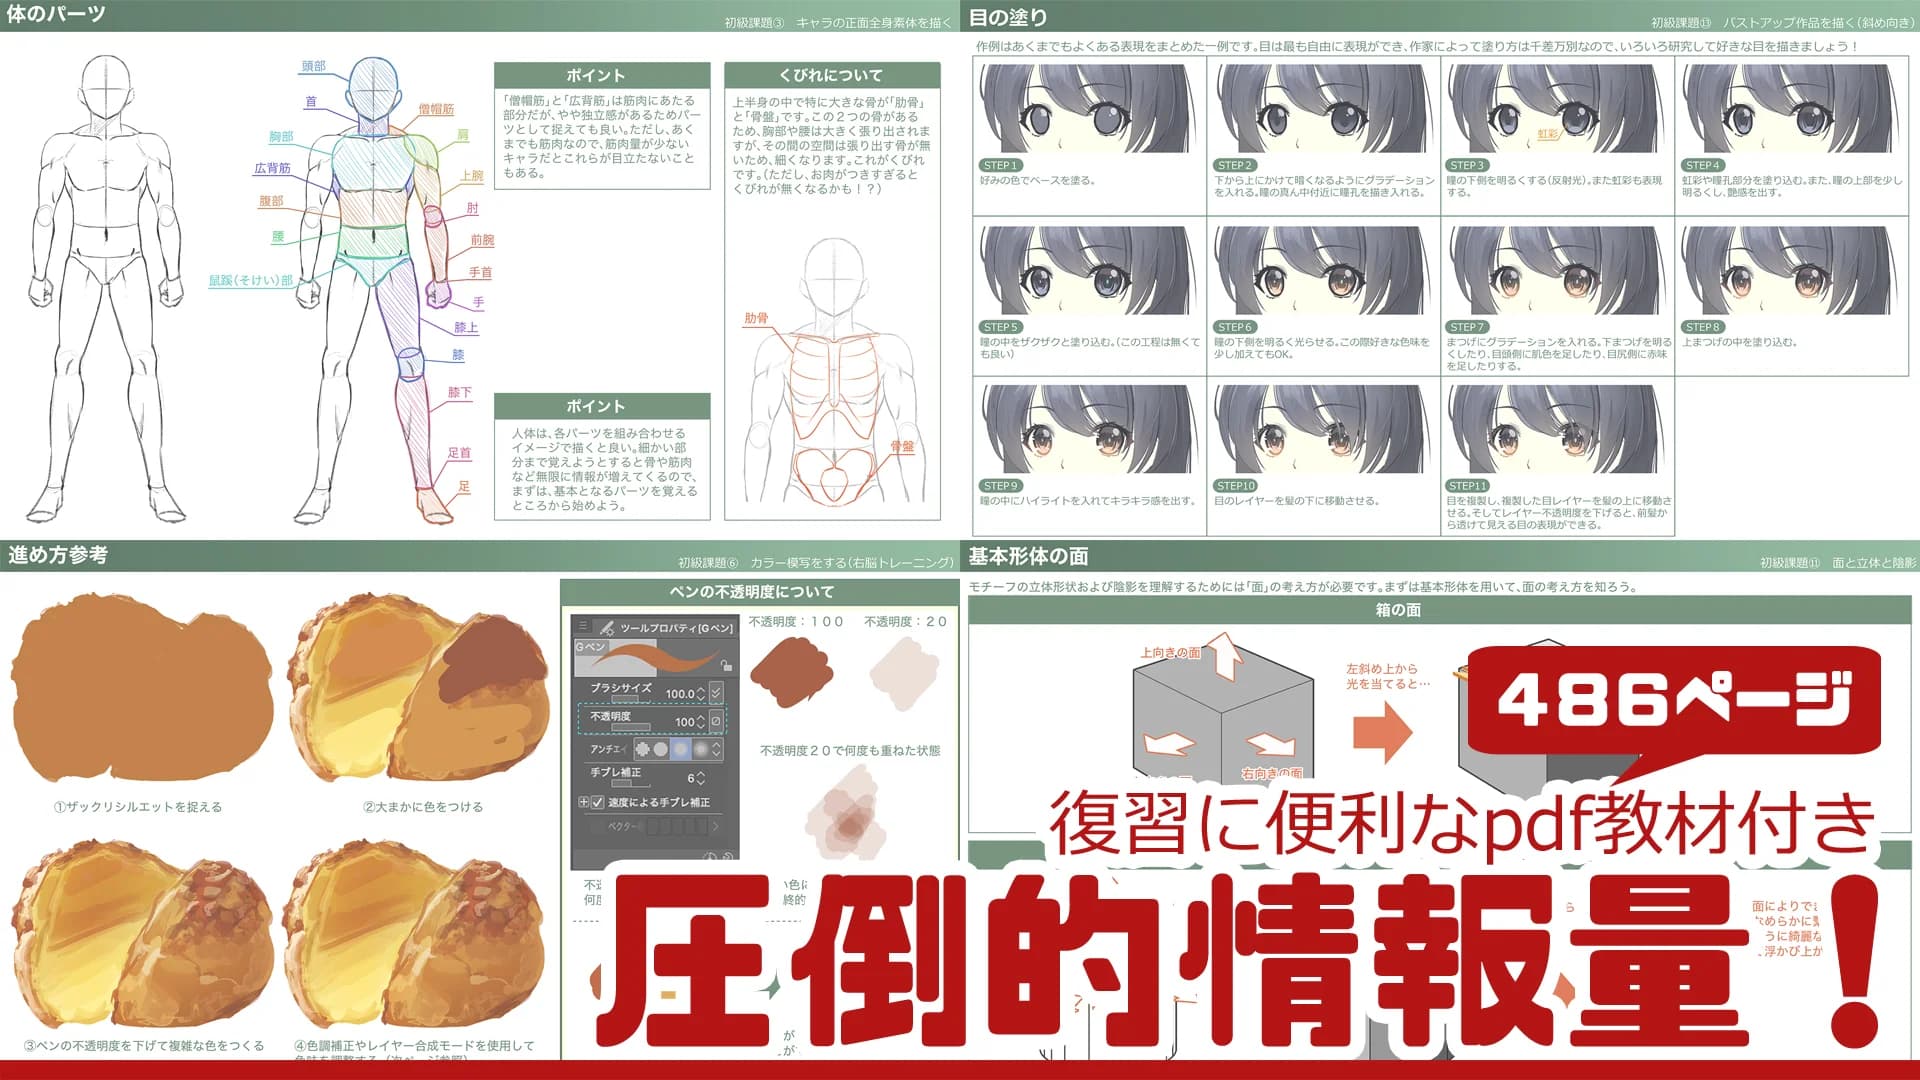
Packed with an immense amount of info!
Creating a high-quality illustration requires a wealth of knowledge and skill. This course condenses four separate programs into one, covering everything with an overwhelming amount of information.
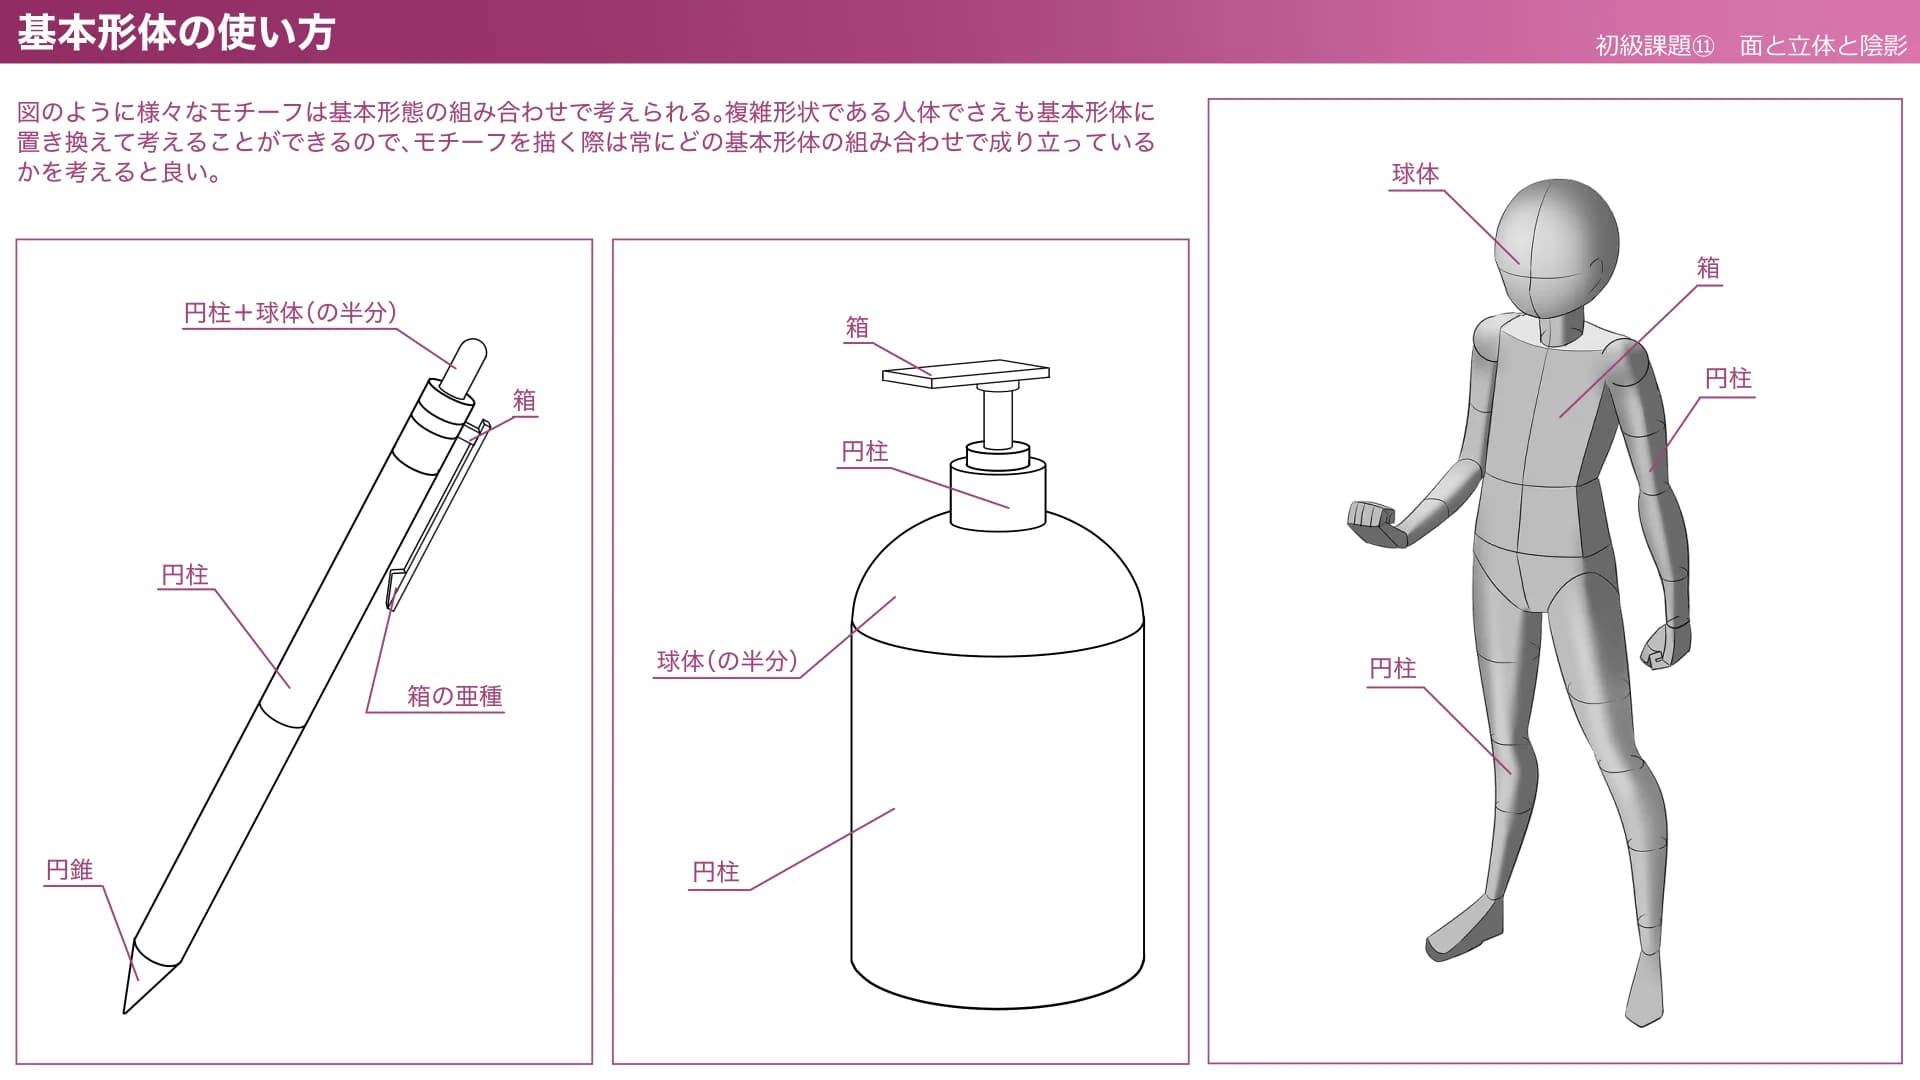
We explain the logic, not just the result.
Don't just copy what you see—work through projects while understanding the "why" behind the techniques.
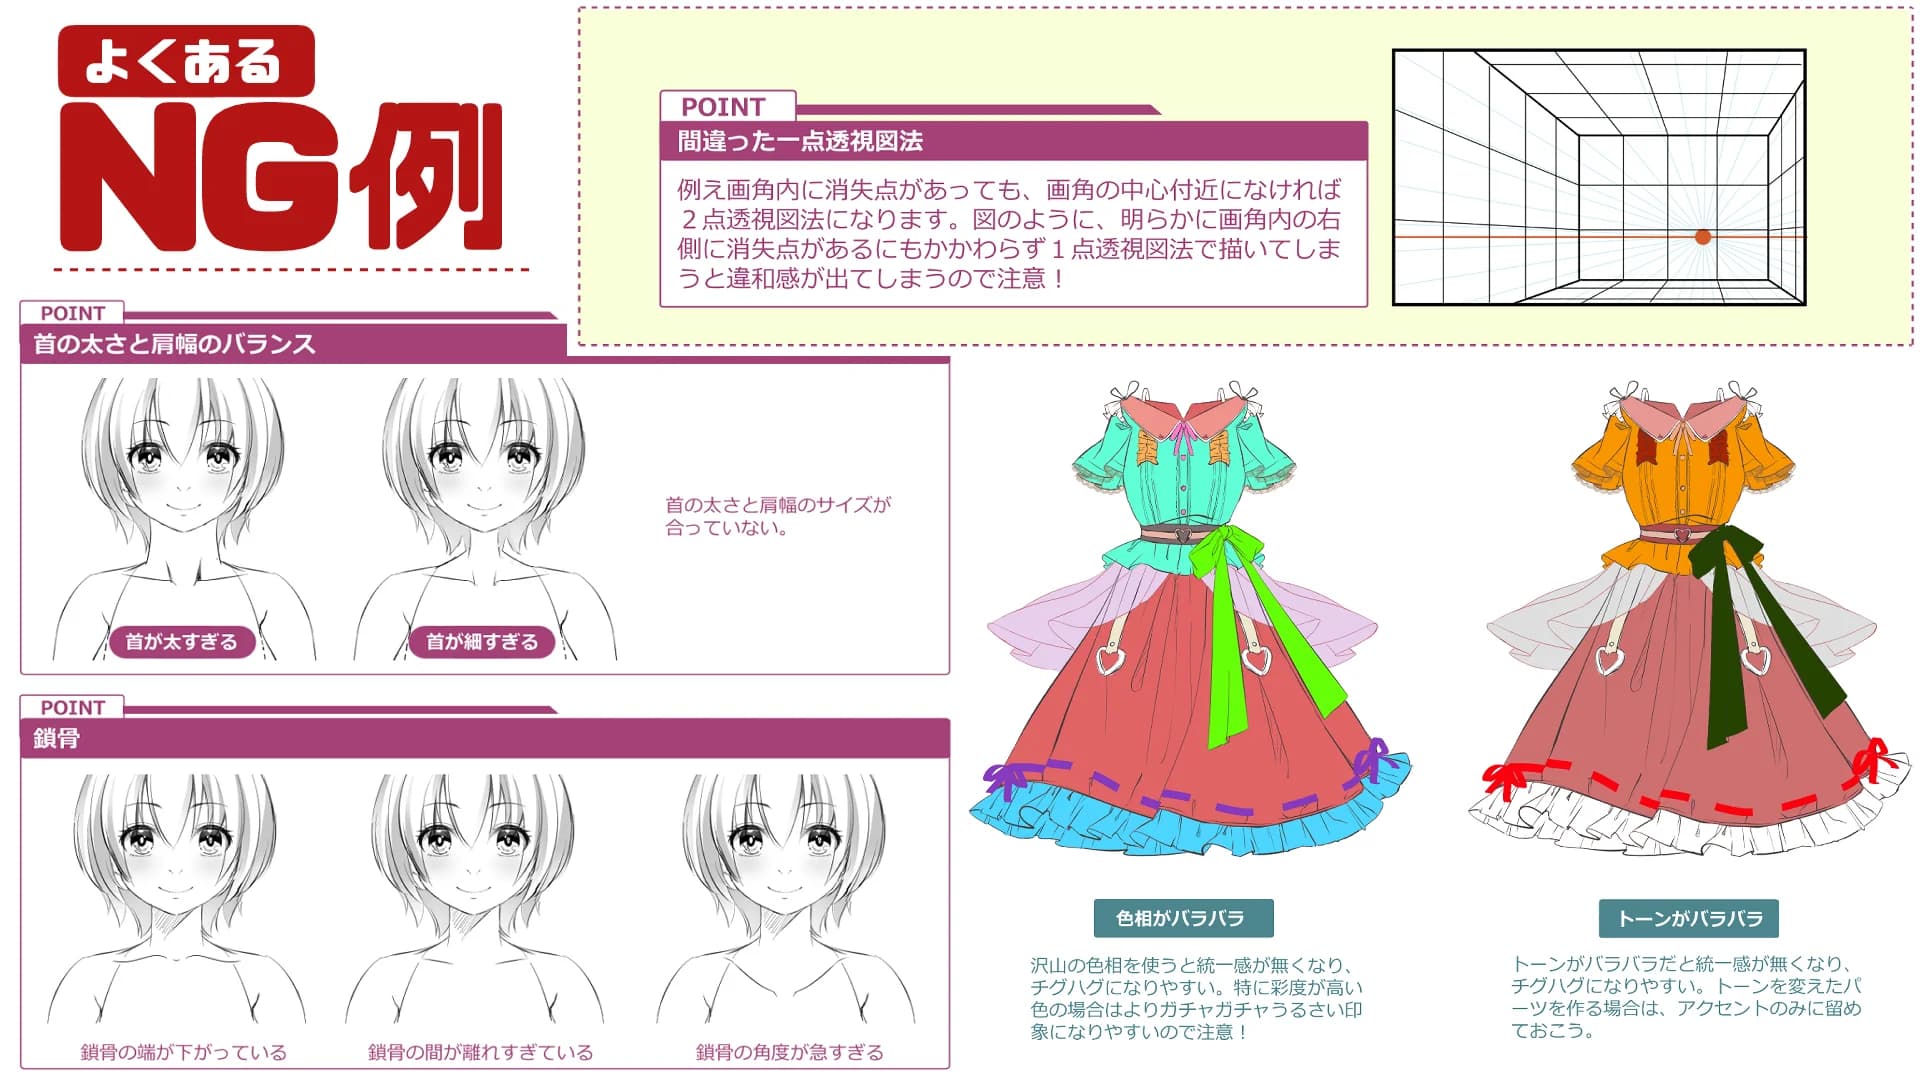
Plenty of 'what not to do' examples!
Mastering both the right techniques and common pitfalls will help you gain a much deeper understanding.
Skills you'll develop
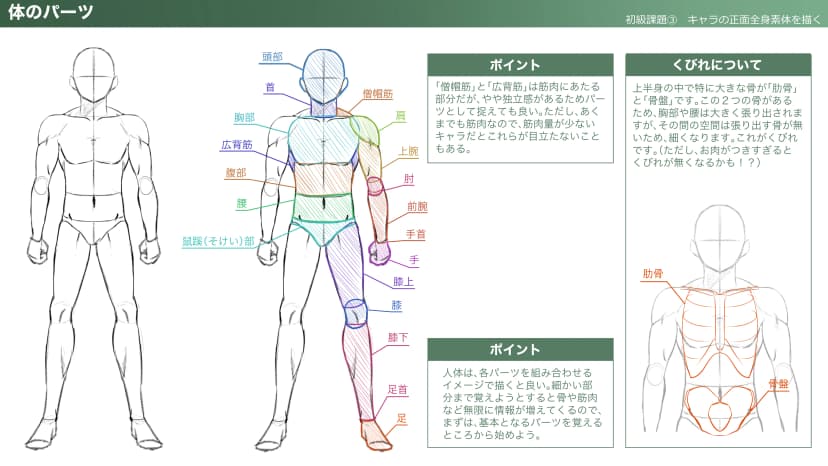
Start here! Character drawing basics!
Most people who start illustrating want to draw characters. In this course, you'll learn the concepts and proportions for every part of the human body, including eyes, torso, and legs.
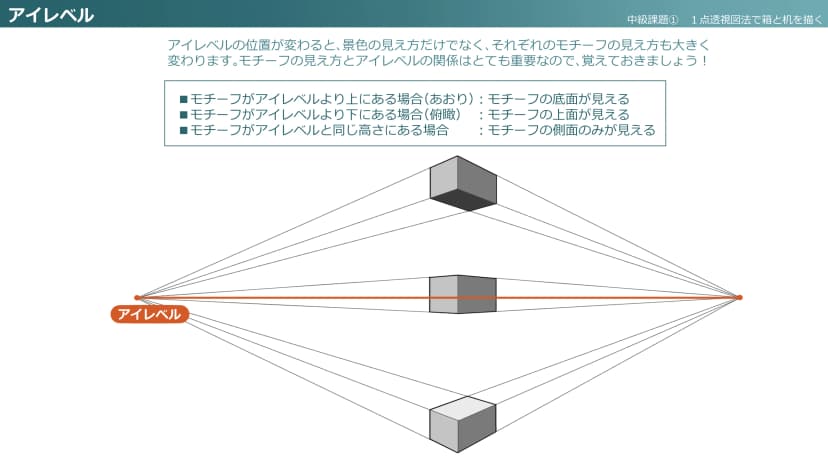
Perspective skills for character and background art!
You need perspective skills to draw characters from any angle or add backgrounds to your work. In this course, you'll first master perspective using simple motifs, then learn how to apply those concepts to the human figure.
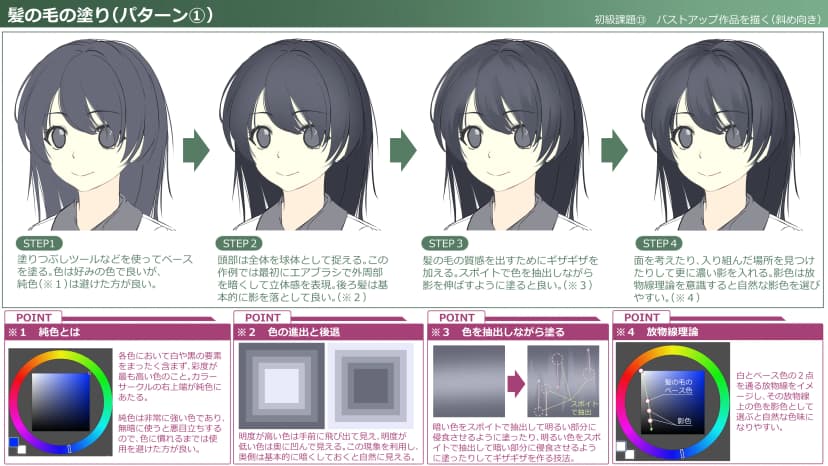
Coloring techniques for shading with real understanding!
To take your work to the next level, you need coloring skills. This course covers the principles of 3D and texture expression, along with cel-shading and painterly techniques.
Included downloadable resources
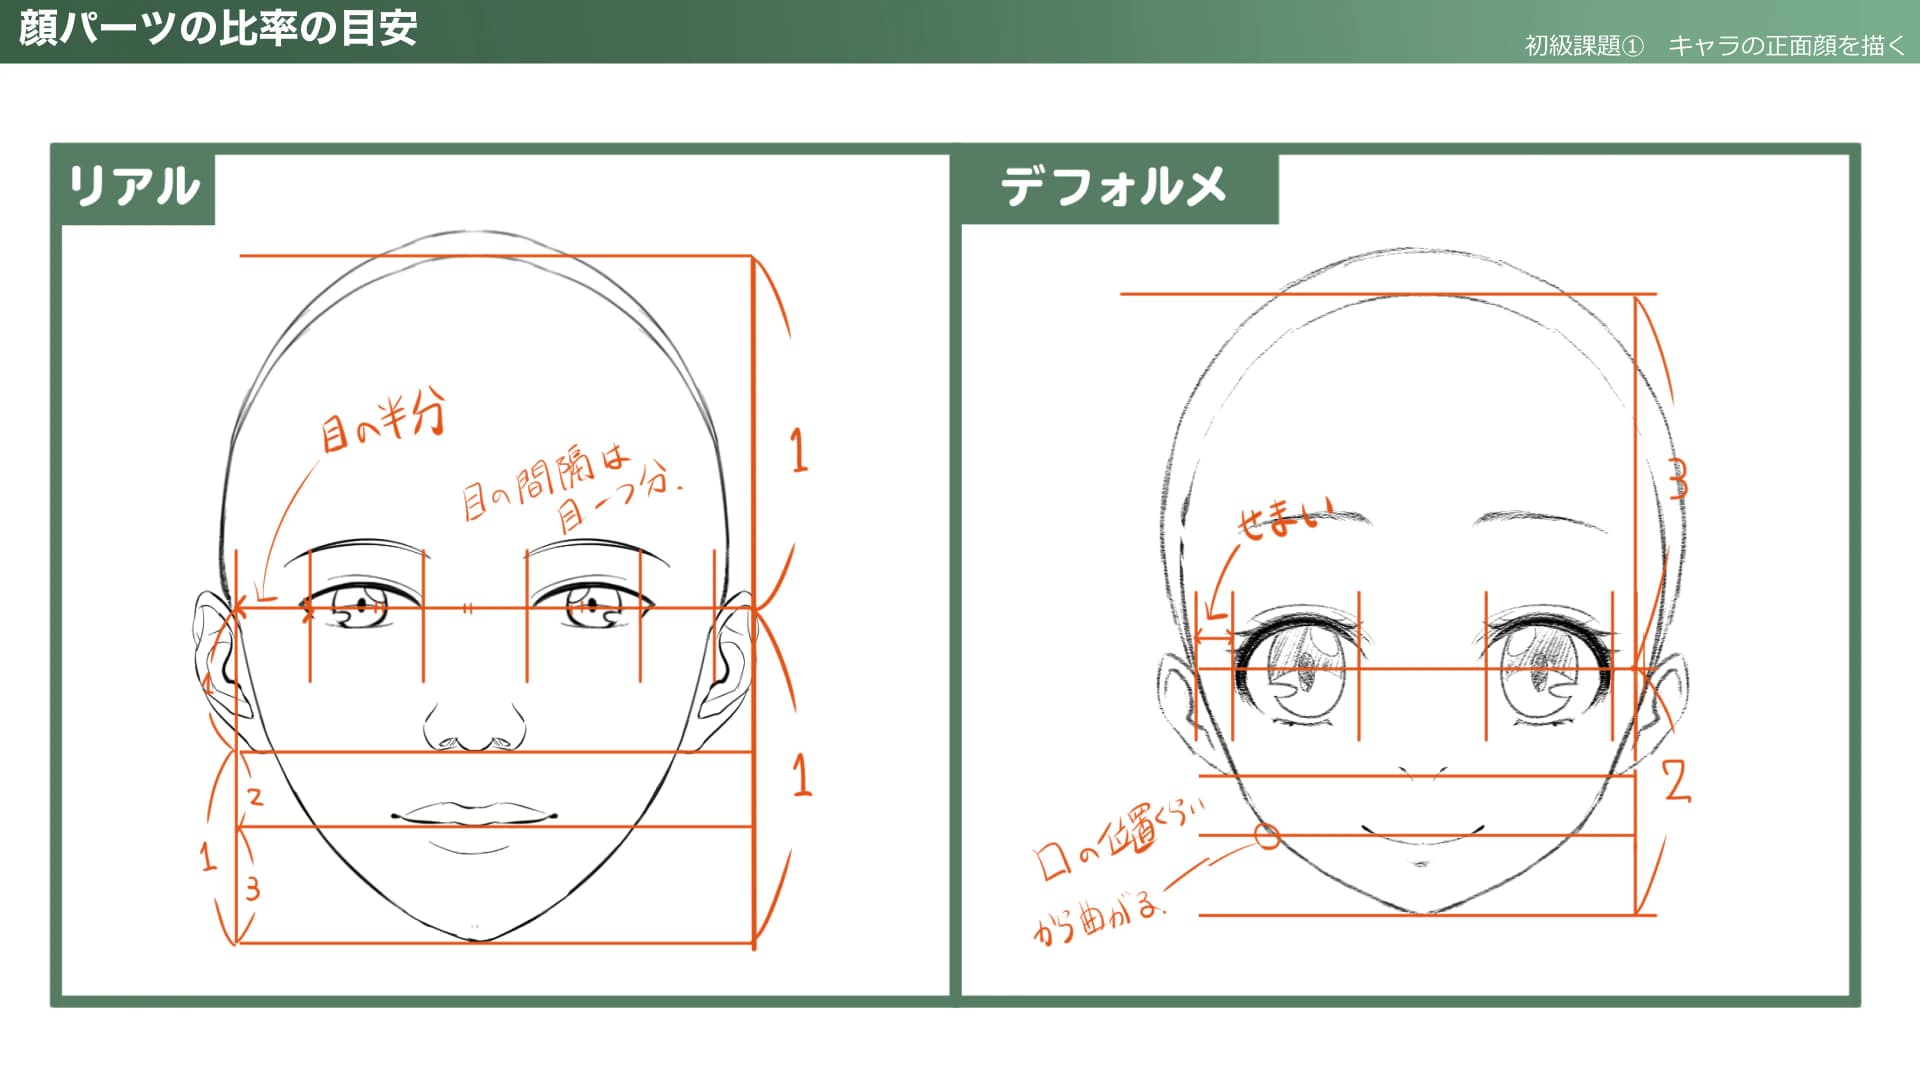
PDF study guides
Every lesson includes a PDF summary of the video content
Perfect for quick review or preparing for your next lesson
Course projects
Follow along with the instructor to create these projects from scratch.
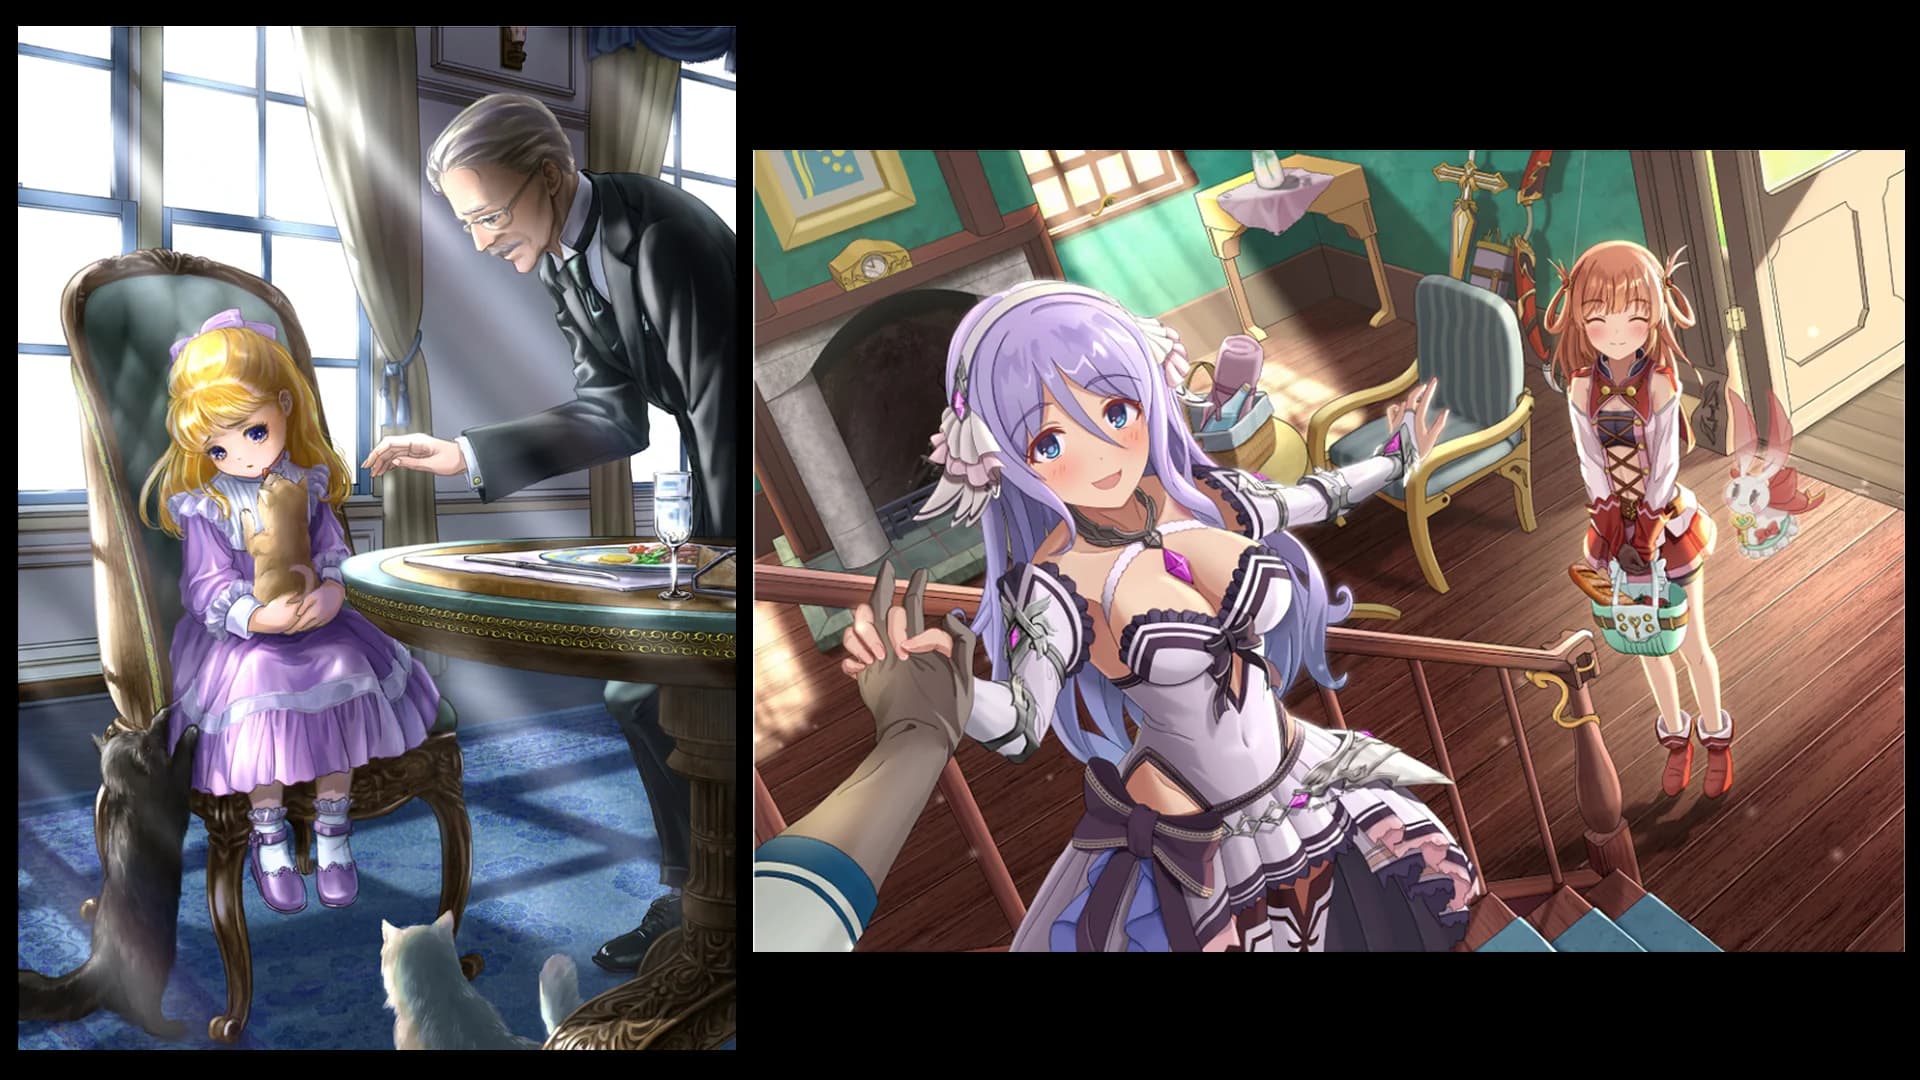
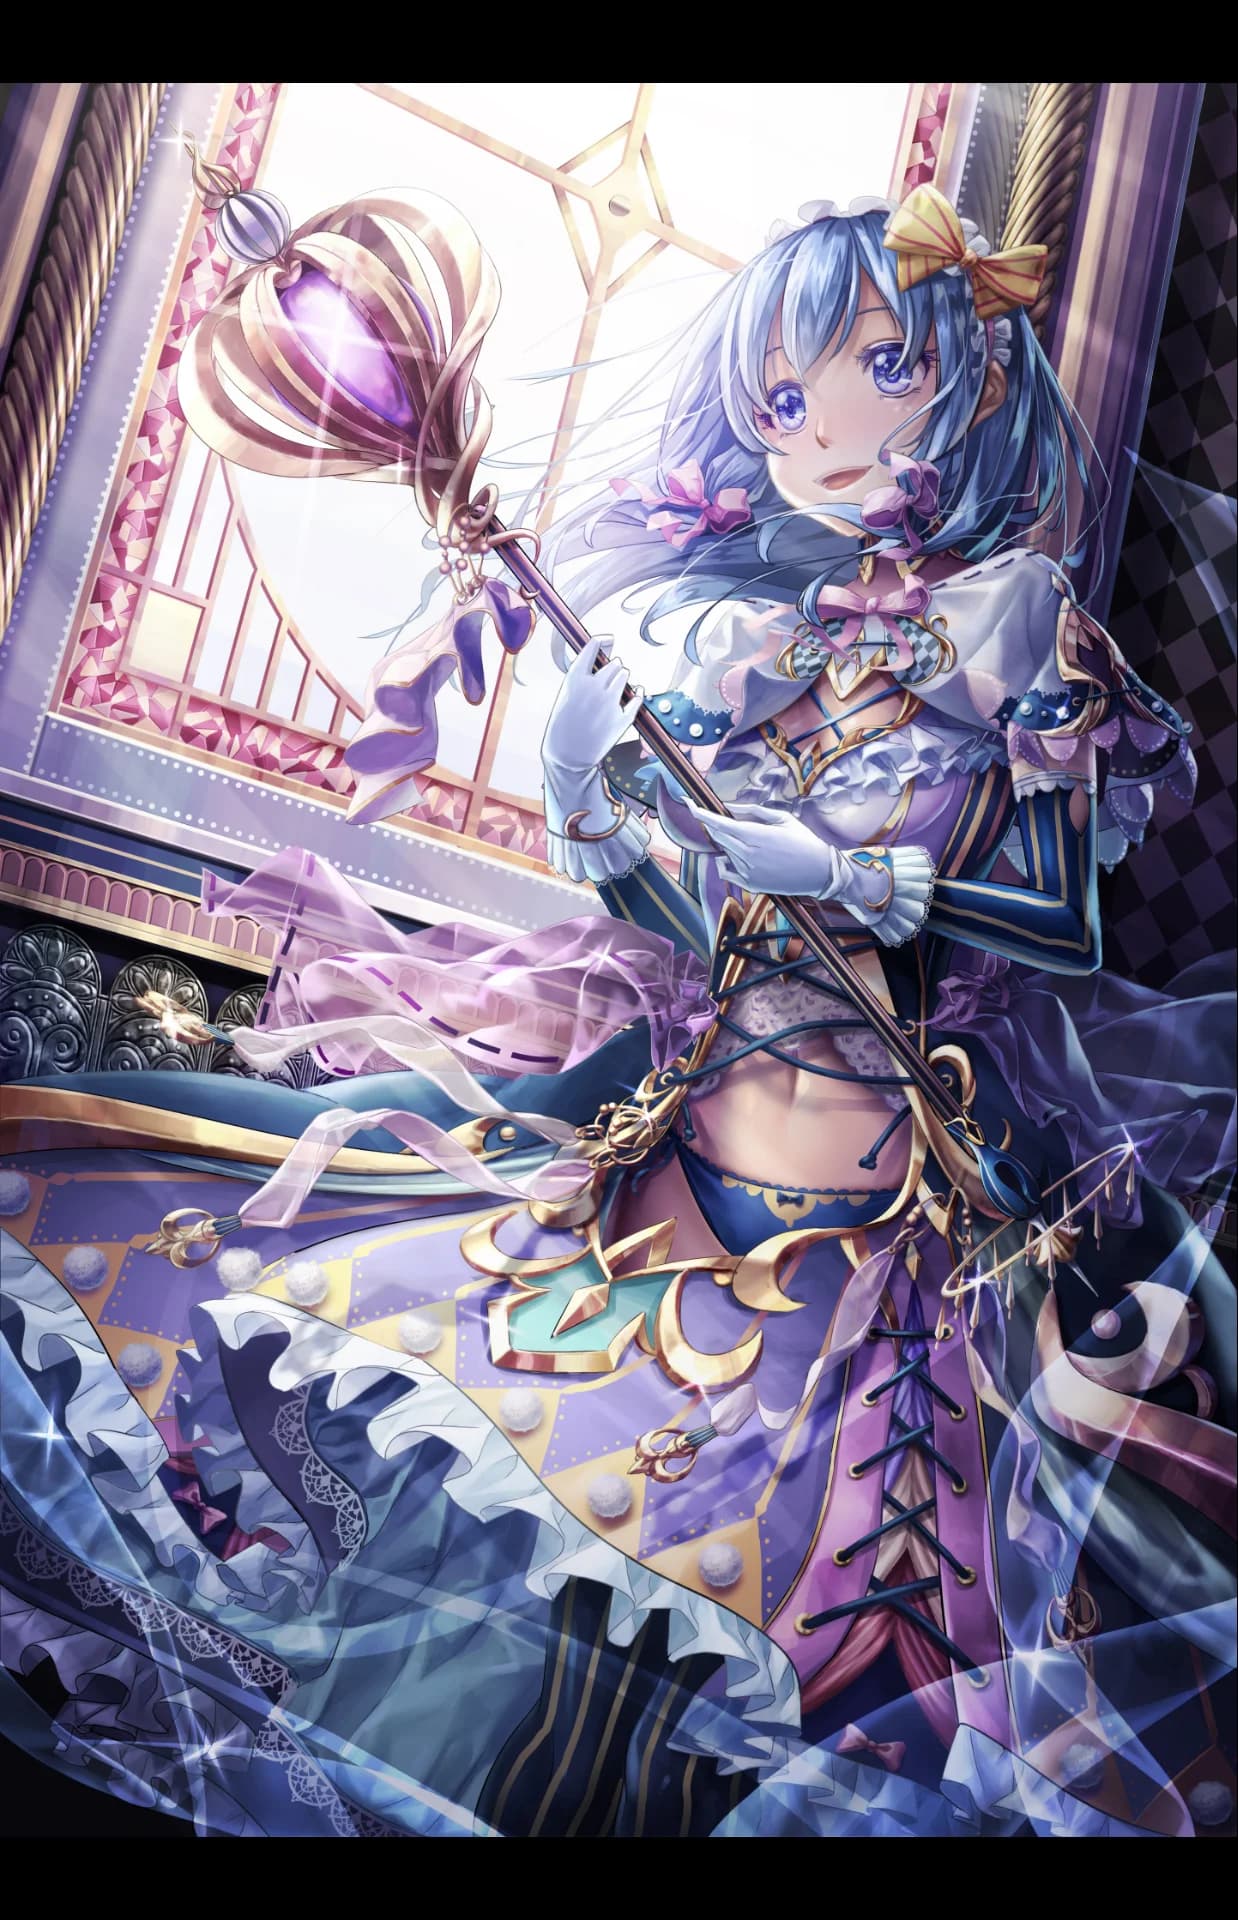
This image is a piece created by a former student. The final goal of this course is to complete a full illustration like this one.
Still deciding? Preview takaillust's course
Preview of Draw a character’s front-facing face!, from the Beginner Class (Foundations) section
This preview shows a portion of the full lesson.
Curriculum
 Learn the structure of facial features like eyes and mouth, along with the proportions and stylization types of real human faces versus character faces. Your goal is to create an original front-facing face based on what you’ve learned.
Draw a character’s front-facing face!
29 minutes Learn about the parts and proportions of the upper body. Your goal is to create a front-facing upper-body base for your original character.
Draw a front-facing bust-up base for your character!
13 minutes Learn about the lower body parts and their proportions. Your goal is to create a front-facing full-body base for your original character.
Draw a front-facing full-body base for your character!
10 minutes Learn the key points to keep in mind when dressing a base, like where clothes cling and wrinkles form. You’ll also cover the basics of drawing tricky parts like collars, shoes, and skirts.
Dress your character’s full-body base with clothes!
11 minutes To draw accurately, you need strong observation skills. But just looking at a reference won’t help you observe effectively. In this lesson, you’ll learn key points to focus on when observing shapes, so you can capture them more accurately.
Practice capturing shapes (hand tracing)
12 minutes This lesson continues with a copy assignment. Since this is a color copy, you’ll need to observe both the shapes and colors. However, the main goal of this lesson is to "draw without overthinking—practice drawing intuitively." While it’s important to draw accurately by thinking things through, it’s also key to draw freely and intuitively. For this assignment, focus on moving your hand freely to draw rather than aiming for a high-quality result.
Let’s do a color copy!
21 minutes You’ve already learned about facial features in previous lessons. This lesson builds on that—you’ll learn key points to watch for when drawing faces from different angles. Angled faces are the most common view you’ll draw, and side views have a unique contour shape. Master both angles through the assignments.
Draw angled and side-view character faces!
15 minutes You’ve already learned about the upper body parts in previous lessons. This lesson builds on that—you’ll learn key points to watch for when drawing from different angles. Angled views are the most common, and side profiles have a unique contour shape, so mastering both will help. Work through the assignments to pick up these tips.
Draw a bust-up base from angled and side views!
13 minutes You’ve already learned how to draw all the parts of the body in previous lessons. This lesson builds on that—you’ll learn what to watch for when drawing from different angles. Angled views are the most common, and side profiles have a unique shape, so mastering both will help. Work through the assignments to practice these key points.
Draw full-body sketches at angles and side views!
8 minutes You’ve already learned how to dress a figure in previous lessons. This lesson builds on that—you’ll learn key points to watch for when drawing from different angles. Changing the angle shifts how you perceive the center line, making things a bit trickier. Your goal here is to accurately capture the center line and create a natural-looking illustration.
Dress a tilted or side-facing base figure!
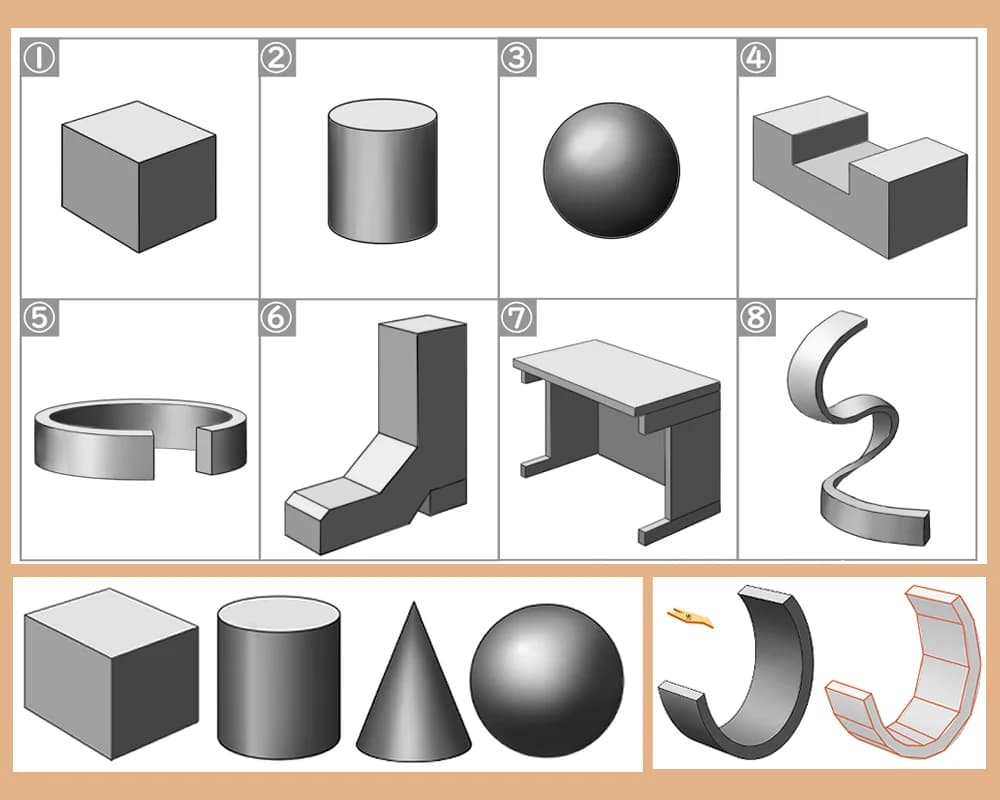
9 minutes "Planes" are the fundamental concept when adding shading to your artwork. Understanding how to interpret planes lets you smoothly determine where light and shadow fall, significantly boosting the quality of your work. In this lesson, you'll learn about planes by applying shading to simple shapes.
Planes and Shading
12 minutes In the last lesson, you learned the importance of planes. A key concept for capturing planes is "stroke direction." Once you understand stroke direction, you’ll grasp planes more smoothly and interpret shadows and shapes more accurately. In this lesson, let’s learn about stroke direction.
Planes and Stroke Direction
16 minutes This is the final project for the beginner class. In the beginner class, you’ll learn the basics of drawing characters and shading. In this lesson, you’ll learn the fundamentals of character coloring. Use these skills to draw your own original character.
Let’s Draw a Bust-Up Illustration!
33 minutes
 Perspective finally makes its appearance. It's a term you're bound to hear when studying art. You don't need perspective if you're just drawing flat illustrations, but it's essential for creating works with a sense of space and volume. In this lesson, we'll cover the concept of perspective and learn about one-point perspective, the most basic type.
Let's Draw a Box and a Desk with One-Point Perspective!
17 minutes In the previous lesson, we covered the basics of perspective. In this lesson, we'll learn how to actually apply perspective to characters.
Let's Draw Standing and Sitting Base Bodies Using One-Point Perspective!
11 minutes After one-point perspective comes two-point perspective. Two-point perspective is one of the basic types of perspective and is frequently used in illustrations. In this lesson, you'll learn how to draw using two-point perspective with simple motifs.
Let's Draw a Box and Desk Using Two-Point Perspective!
10 minutes In the previous lesson, we learned about two-point perspective. In this lesson, we'll look at how to actually apply two-point perspective to characters.
Let's draw standing and sitting base bodies using two-point perspective!
8 minutes Perspective isn't just for drawing characters; you also need it to build backgrounds and spaces. To draw well using perspective, it's key to get a feel for how size changes with distance. In this lesson, we'll focus on how to draw spaces using perspective and how to master the sense of scaling with cubes. Since all sides of a cube are the same length, it's an easy subject to use for noticing how side lengths change with perspective.
Space and Cubes
19 minutes In previous lessons, we applied perspective to the human body. In this lesson, you'll learn how to apply perspective to the face. The face has various features, each with specific points to watch for, so let's master them through the exercises.
Let's Draw Foreshortened and Bird's-Eye View Faces with Two-Point Perspective!
10 minutes Hands and feet are some of the toughest parts to draw when creating character illustrations. They’re difficult not only because of their complex shapes, but also because they have many joints, which makes their movement complicated too. It’s easy to get sloppy with hands and feet when you’re just starting out, but mastering them boosts your character’s appeal significantly. In this lesson, we’ll cover key tips and things to watch out for when drawing hands and feet.
Let's Draw Hands and Feet!
23 minutes In the beginner class, you learned about the parts of character figures. But if your characters are always in stiff, standing poses, you can't fully bring out their charm. In this lesson, you'll learn how to move the body and key tips for creating a sense of energy, with the goal of producing characters with dynamic movement.
Let's Draw Dynamic Poses!
17 minutes This lesson focuses on a coloring exercise. In the beginner class, you learned the basics of adding shadows, but knowing a few techniques can help you further improve the quality of your work. In this lesson, we'll learn how to think about the design of shadows through anime-style coloring.
Let's Paint Hair with Anime-Style Coloring!
13 minutes In the last lesson, we learned about design as a way to boost the quality of your work. In this lesson, we'll use impasto techniques to learn how to paint with complex tonal values for a 3D look. Mastering both the design of shadows and the sense of volume will significantly improve your painting expression, so be sure to pick up these skills.
Let's Paint Fur with Impasto!
11 minutes When adding color, design and depth are crucial, but learning to render texture will take your coloring to the next level. Texture comes in many forms. In this lesson, we’ll focus on three key characteristics you should master: "hardness," "surface condition," and "transparency."
Let’s Add Texture!
35 minutes In previous lessons, you've learned how to draw human characters. To make your original characters even more appealing, clothing design is key. It's easy to just add elements you like, but the important part is how you add them. In this lesson, you'll learn the concept of "visual weight" and how to effectively add and think about design elements. These concepts apply not only to design but also to composition, so let's get a feel for them through this lesson.
Let's Design Clothes!
17 minutes This lesson focuses on applying color schemes to the clothing designs created in the previous session. Simply picking your favorite colors doesn’t always result in a balanced overall look. In this lesson, you’ll learn the basic principles of color schemes and tones, with the goal of expressing various moods through color.
Let’s Choose Colors for Clothes!
16 minutes
 To draw a room, it's vital to understand the "perspective" and "planes" we've studied so far. Additionally, since background illustrations contain various motifs within a single piece, you need to create an atmosphere while considering their harmony. This lesson aims to help you grasp the overall image by first learning about color harmony and then creating a rough sketch.
Let's draw a room with 2-point perspective! (Rough sketch edition)
18 minutes You'll create the line art based on the rough sketch from the previous lesson. Line art isn't just about tracing; you need to draw more accurately and specifically. In this lesson, you'll learn key tips for creating clean line art and finish the line drawing of your room.
Draw a room with 2-point perspective: Line art
19 minutes In this step, you'll finish the line art you created in the previous lesson. Since the overall atmosphere was already decided in the rough draft, you just need to polish it. As you paint, you can improve the quality by focusing on details. This lesson covers key points for the finishing touches to complete your room illustration.
Draw a room with 2-point perspective: Coloring
21 minutes These works are commonly called "item illustrations" or "material illustrations." Unlike character or background illustrations, item illustrations require you to produce a single motif with high quality. In this lesson, we'll use a "pendant" and "shoes"—both closely related to characters—as our motifs to learn the key points of line art.
Draw a Pendant and Shoes! (Line Art)
12 minutes You'll paint the line art you created in the previous lesson. Since item illustrations require high quality in a single motif, they demand more detail in terms of 3D form and texture compared to characters or backgrounds. This lesson aims to help you complete your work by teaching you how to think about details during the coloring process.
Let's paint the pendant and shoes!
15 minutes Since we don't draw characters from behind very often, you might not be sure how to start when you actually try. However, if you want to be able to draw characters from any angle, it's important to learn how to draw the back. In this lesson, we'll learn how to draw the head from a rear view.
Let's draw the back of the head!
8 minutes Since we don't draw the back of characters often, it's hard to know how to start. However, to draw characters from any angle, you'll need to master the back view. We drew the head from behind in the last lesson, so today you'll learn how to draw the body from the same perspective.
Draw the body from behind!
8 minutes Clothing folds are one of the most challenging parts of drawing characters. While understanding flow and planes is difficult, mastering them will significantly boost your character's quality. In this lesson, you'll learn fold patterns and how they form.
Let's draw clothing folds! (Line Art)
18 minutes In this lesson, you'll color the clothing folds drawn in the previous session. Coloring is a challenging step because it requires a strong grasp of the flow and planes of the folds, but getting it right significantly boosts your character's quality. This lesson focuses on understanding the concept of flow and planes to complete your artwork.
Draw Clothing Folds (Coloring)
13 minutes The key point of this lesson is "randomness." When coloring, if your use of color or brushwork is monotonous, your work will lack depth and end up looking mediocre. It's particularly difficult to create color variations in elements like the ground where there's little surface change, but you can eliminate monotony by effectively adding randomness. Also, when drawing small clustered objects like grass, it's very important to perceive them as clumps rather than drawing each blade individually. The goal of this lesson is to learn how to apply randomness and how to capture these clumps.
Let's paint the ground (grassland)!
18 minutes A full illustration tests your overall skills, incorporating many essential elements like characters, perspective, 3D form, coloring, and design. Among these, 'composition' is the key element you'll need to focus on. Since a well-thought-out composition makes for a compelling piece, let's learn about composition in this lesson and work on your rough sketches.
Let's draw a full illustration with 2-point perspective! (Rough sketch phase)
22 minutes You'll create the line art based on the rough sketch from the previous lesson. You can boost your quality beyond the rough draft by clearly defining details like hardness, thickness, and structure during the line art stage. In this lesson, you'll learn about including these concrete details to create high-quality line art.
Let's draw a full illustration with 2-point perspective! (Line Art)
10 minutes When coloring a full illustration, setting the light source and handling light is just as important as planes and textures. In this lesson, you'll learn how to think about light to effectively express your ideal mood and situation as you finish your piece.
Let's paint a full illustration with 2-point perspective!
21 minutes
 You've learned how to draw figures in previous lessons, but you need to differentiate your style to express gender differences clearly. Men and women have slight differences in bone structure and muscle placement, so those must be distinct. Additionally, varying your line quality and flow is also effective. This lesson covers more than just anatomical differences; you'll also learn to use lines and flow for better expression.
Learn to Draw Gender Differences!
15 minutes Drawing different ages is an exciting challenge. To do it well, you'll need to step outside your usual style and intentionally adjust the balance of the face and body. Just like in the previous lesson, your line work (line quality) also plays a key role. In this lesson, you'll learn how to shift feature placement and proportions, and how to use lines to effectively depict different ages.
Mastering age variation
18 minutes Good stylization is about more than just drawing things smaller or with shorter body proportions. It requires you to simplify and exaggerate features to create a cute and polished look. In this lesson, you'll learn how to stylize various motifs and apply those techniques to create your own stylized characters.
Let's draw stylized characters!
11 minutes You've learned a lot about characters in previous lessons, but expressions are key to raising your character's quality even further. Lively expressions make characters look unique and charming. In this lesson, we'll cover key points for main expressions and aim to create a set of expression variations.
Let's draw facial expression variations!
12 minutes Drawing natural backgrounds requires the ability to draw freely and randomly. This skill is vital for illustration, but putting it into practice can be surprisingly difficult. In this lesson, we'll use common natural motifs—rocks, trees, clouds, and mountains—to learn how to perceive each 3D form while mastering the skill of drawing freely and randomly.
Let's draw natural backgrounds!
35 minutes In this lesson, your task is to change the time of day for the natural background you created previously. Since light sources at evening or night differ from daytime, you'll need to adjust how you use color (color rendering). You'll learn how to choose colors for various lighting conditions and how to actually change those colors using digital tools.
Let's create time variations!
17 minutes In real life, people aren't always standing straight; they're often twisting their bodies. Because of this, body twists are effective for making your characters look more natural and expressing movement or dynamism. Drawing a twisted body is quite difficult, but in this lesson, you'll learn the key points and master the tricks for twisting poses.
Let's draw twisting poses!
9 minutes In the intermediate class, you learned one-point and two-point perspective, but in this lesson, you'll learn three-point perspective. While drawing becomes a bit more complex compared to one or two points, these three techniques form the foundation of perspective, so make sure to master three-point perspective too.
Draw a box and desk using three-point perspective!
9 minutes In the previous lesson, we learned about 3-point perspective. In this lesson, we'll learn how to actually apply 3-point perspective to human figures.
Draw standing and sitting figures using 3-point perspective!
11 minutes While drawing 3-point perspective is slightly complex, you won't struggle much if you clearly understand the method. However, the real difficulty lies in maintaining balance. This is because 3-point perspective creates intense distortion while adding depth to the height. Mastering this sense of perspective requires a lot of experience, so in this lesson, you'll learn about perspective sketching—one of the most effective training methods.
Let's Try Perspective Sketching with 3-Point Perspective!
9 minutes It's finally time for the final project. The basic concept is the same as the 2-point perspective illustration from the advanced class, but with 3-point perspective, you'll see a tilt in the image because the vertical axis also has perspective. In this lesson, you'll learn about this tilt and aim to create a powerful 3-point perspective rough sketch.
Let's draw a full illustration with 3-point perspective! (Rough sketch phase)
8 minutes The key points for line art are basically the same as with 2-point perspective. In this lesson, let's learn about common mistakes when drawing low or high angles, as well as perspective for slopes and stairs, to use in your work.
Let's draw a full illustration with 3-point perspective! (Line art)
19 minutes The key points to remember when coloring in three-point perspective are basically the same as in two-point perspective, but three-point perspective is unique because it often involves the concept of "tapering" along the vertical axis. In this lesson, we'll learn about "tapering" to create cleaner spatial expressions and complete a high-quality piece of art.
Let's paint a single illustration using three-point perspective!
10 minutes
Recommended software
This course is taught using Clip Studio Paint. We recommend using it so you can follow along step by step, but equivalent software works just as well. The software isn't included with your purchase.

Clip Studio Paint
Frequently asked questions
What do I get when I purchase this course?
When you purchase a course on Prentora, you get instant access to stream or download all course videos. You own lifetime access with no restrictions. Watch anytime, as many times as you want.
How long do I have access to the course?
Lifetime access. Once you purchase, the course is yours forever. There are no expiration dates or recurring fees.
How do I watch the course?
Stream instantly in your web browser on any device: desktop, laptop, tablet, or mobile. No app required, just sign in and start learning.
What if I'm not satisfied with the course?
You may request a refund within 14 days of purchase as long as you haven't watched or downloaded more than 3 videos. See our full refund policy
Can I download the videos?
Yes! Download any or all videos to watch offline without restrictions. No DRM.
Course details
- Foundational to Intermediate
52 videos
13 hours 14 minutes
Japanese
English, French, Spanish, Korean, Mandarin (Simplified), Mandarin (Traditional)
English, French, Spanish, Korean, Japanese, Simplified Chinese, Traditional Chinese
Downloadable resources included
Price: